It will protect your Mac from all kinds of threats that can harm the device and data, transferring via the internet.
You can go to McAfee.com/activate and install McAfee Internet Security on Mac.
Steps to Install McAfee Internet Security on Mac
McAfee Internet Security is supported by MacOS 10.12 or later.
Here are the steps that you can follow to install it on your Mac:
After checking the internet connection, launch a web browser of your choice (Safari is preferred).


McAfee provides features that help you stay protected.
If you want to install McAfee mobile security on Android device, you need to follow the instructions given below.
After that, you should open the Google Play Store.
Later, tap on McAfee Mobile Security from the results.
You have to select two questions and give their answers.
After that, tap on “Activate uninstall protection.”

The error notification “Your PC isn’t connected to the Internet” appears on your screen, especially when you are using Microsoft Store.
This issue occurs on your device due to an unreliable Internet connection.
In this article, we will show you how you can fix this issue.Clear Microsoft Store Application CacheHere are the steps to follow:Tap the Windows + R button on your keyboard to open the Run command prompt.In the Run search tab type “WSReset.exe” and then click “OK.”After the above process “Reset tools” run and clear current settings.Your Windows Store application will clear now, and you can work as you wish.Update Time and Date settingsHere are the steps to follow:Right-tap on the “date/time” button in the settings.Select “adjust time/date.”You need to switch the option “set time automatically” to off.Select “Change” in the “Change time and date.”Here you need to adjust time and date with the time zone.Tap on the “Change” button again.Now close the windows.Runs Windows applications in-built TroubleshooterHere are the steps to follow:Tap “Start.”Select “Settings.”Click “Application.”Click “Apps and Features.”Click the “Store” application.Click “Advanced.”On the next screen, click “Repair.”Now you need to wait for the repair process to be finished.Repair Network SettingsHere are the steps to follow:Right-tap on the “network” logo display in the system tray.Select “troubleshooter problems.”Allow the process to get over.For Windows 8:Here are the steps to follow:Tap the Windows +C to launch the Charms tab.In the charms search bar, type “Troubleshooting.”Now find the “Troubleshooting” option in the “settings” and then tap on it.In the following search field, your need to type “Network Troubleshooter.”Select “Network troubleshooter” to start the troubleshooting process.Now follow on-screen instruction and then check the issue resolved.For Windows 8.1Here are the steps to follow:Select the “Start” button and then type “Network problem” in the search field.Here you can see several choices on your screen, select “Identify and repair network problems.” to open Troubleshooter.You need to wait until the troubleshooting is over.For Windows 10Here are the steps to follow:Select the “Start” buttonIn the search field, you need to type “cmd.”Right-tap on the cmd.exe and then select run as administrator and then you need to enter the given command in the search field and tap the “Enter” button every time:netsh winsock resetnetsh int ip resetipconfig/release.ipconfig/renew.ipconfig/flushdns.After that, restart your device and then check for improvement.Restart Your ComputerIt is one of the easiest and simple solutions to fix several issues.
So to fix this issue, you need to restart your system and then check if the issue has been resolved.Turn off the Proxy ServerHere are the steps to follow:Tap the Windows + R button on your keyboard to launch the Run command prompt.In the Run command-line, you need to type “inetcpl.cpl” and then tap “OK.”Select the “Connection” button.Then you need to click “LAN Settings.”Select the “Automatically detect settings” button.Deselect “Use a proxy server ….” in the “Proxy server.”Tap “OK”Turn off Antivirus and FirewallSometimes you need to disable third-party antivirus programs temporarily to fix several issues from your operating system.Windows 7Here are the steps to follow:Tap on the ‘Start” button.Select “Control panel.”In the search field, you need to type “Windows Firewall.”Tap on the “check firewall status.”Select “turn windows firewall on/off.”Select “turn off the firewall.”Click “OK.”For Windows 10Here are the steps to follow:Tap on the “start” buttonIn the search field, you need to type “firewall.”Select “check firewall status.”Select “turn windows firewall on/off.”Select “turn off the firewall.”Click “OK.”For Windows 8.1Here are the steps to follow;Tap on the “Start” button and then select “Control Panel” to launch the Windows Firewall.Select “Windows Firewall.”Tao on “Turn Windows Firewall on/off.”Select disable the firewall.Click ‘OK.”Disable AntivirusHere are the steps to follow:Select the “Start” button on your device.Click “Settings.”Select “Updates and Security.”Tap “Windows defender.”Here you need to set real-time protection.Remember to enable antivirus when you have fixed your issue.Reset Internet ExplorerHere are the steps to follow:Launch Internet Explorer.Select “Tools” and then tap on the “gear” symbol.Select “Internet Option.”Select the “Advanced” button.Select “Reset.”Here you need to wait until the process is finished.Now restart your device.Reset Edge BrowserHere are the steps to follow:Tap on the “Start” button.Select “all applications.”Open “Microsoft edge” by tapping on it.Click the tab button to access settings.Bottom down and then click “Choose what to clear.”Select “Clear browsing data.” You can also tap “Show more.”Now select entire things and then tap the “Clear” button.
Perform SFCHere are the steps to follow:Tap on the “Start:” button.In the search field, you need to type “cmd.”Right-tap on the “cmd.exe” and then select “run as administrator.”In the Run search field you need to type “sfc /scannow” This will scan your operating system and fix the issue automatically.Tweak Microsoft ServiceHere are the steps to follow:Tap on the “Start” button on your device.In the search field, you need to type “msconfig” and then tap “OK”Select “system configuration.”Tap the “service” button.Select “Enable all” to reactivate the entire Microsoft service.Ava Williams is a self-professed security expert; he has been making the people aware of the security threats.
His passion is to write about Cybersecurity, cryptography, malware, social engineering, internet and new media.

Digital reach is all set to revolutionize the personal life, work, healthcare facilities and business environment.
It is touching all aspects of our life.
Security has now become a significant concern.
Ongoing as well as the upcoming era is facing severe security challenges.
Day to day security breaches and unethical interference with your system is increasing with tremendous speed.Source url :- https://mcafeeoactivate.com/how-to-set-up-and-configure-mcafee-internet-security-on-mac/

McAfee Retail Card activation at www mcafee com/activate, enter your product key for Activate.
Download & Install McAfee Antivirus Software.Toll Free 1-844-296-4279 (USA & Canada) Online Help by Certified professionalRemote Virus Removal and Support Remote infection evacuation and backing gives total remote PC fix and infection expulsion support by getting a particular mcafee.com/activate master to settle all your PC related stresses.
We are specialists in remote PC support – our accomplished experts associate with your work area remotely to illuminate all your PC issues like expulsion of infection, malware, Trojans, and so forth.
The online infection evacuation and bolster that we offer, mcafee.com/install through of talk based sustenance sessions, would help you perceive your PC issues and after that however you kick back and watch, we explain and safeguard your PC from extra issues.
With remote infection expulsion and backing from, you can keep your PC bother free… dependably!100% Guaranteed Support What's Remote Virus Removal and Support?
It's a world–class overseer administration, which gives brilliant specialized help to all your PC related issues.

Those devices which are released a few years ago don’t have the latest updates regarding security.
For decades, China has been building and refining the ability to track its citizens’ whereabouts and interactions to contain dissent and protest.
The state’s effort to try to contain the rapid spread of the new coronavirus is now testing the limits of that surveillance system.
Photographer: Qilai Shen/BloombergSource- https://softwarerichard.wordpress.com/2020/05/20/buying-an-old-android-device-know-about-the-privacy-and-security-loopholes/What is the Highest Security Path of Device’s OS?Some technology experts are always up to for finding new hole in mobile device’s software, and to keep the users safe and to not get exploited, the company releases security updates.
Whenever the company sees any threat to the mobile devices, they release new security updates to solve the issues.
Using Out of Date Mobile Device is Safe?
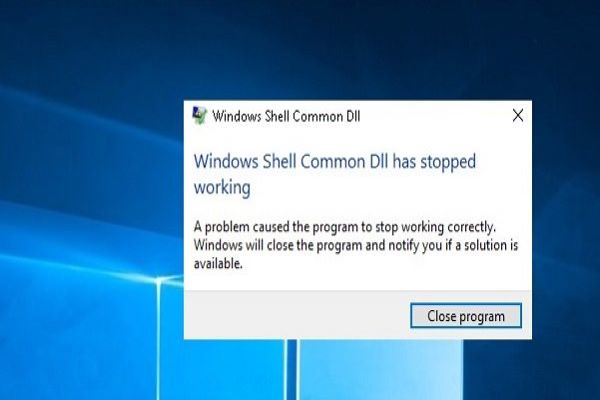
Several errors might appear on your computer and one of them is the Windows Shell Common Dll has stopped working.
This error prevents you from practicing primary Windows features, also can severely reduce your productivity.
In this blog, we will teach you how you can fix this error in a straightforward way.Sources :- Windows Shell Common DLL has stopped Working Error , Mcafee.com/activate 1) “Windows time service” is workingTap Windows + R key and enter service.msc, now tap enter or hit OK.In the next screen service Windows will appear, here find “Windows time service”.Then right-tap on it and then choose Start on the menu.When the “Windows time service” is launched, you can change sate and time in your PC without having any issue.
Remember one thing this solution is only working when the error notification appears on your screen when you are trying date and time.2) Using another App to Change Microphone SettingsHere are the steps on how to fix Windows Shell Common Dll has stopped working error using another app to change microphone settings:Launch Bandicam and visit the Settings.Now tap on the Settings option in the Record menu.Record settings will appear on your device, and now you only need to tap on settings option that appears near the microphone.After this above process, you can view standard microphone windows, and you can change the settings without having any issue.3) Reinstall Audio DriversHere are the steps on how to fix Windows Shell Common Dll has stopped working error through reinstalling the audio driver:Tap windows + X key to open the Win + X list, and pick Device Manager within the list.When the Device Manager finds Audio operator, then right-tap on it.Select the Uninstall device on the menu.In the next Windows, a Confirmation dialog appears now Check to Exclude driver software from this Computer.Tap on Uninstall to remove your audio driver.After this above process, Windows will automatically install the lacking drivers and fix the issue.
Some users suggest restarting your computer instead of an uninstalling audio driver.4) Changing Security PermissionHere are the steps on how to fix Windows Shell Common Dll has stopped working error through changing security permission:Tap windows + R key and enter regedit.Tap Enter and the OK.Now the Registry Editor appears on your screen, navigate to the (ComputerHKEY_CURRENT_USERSoftwareMicrosoftWindowsCurrentVers) key,Right-tap on UserChoice and choose Permissions on the menu.In case you find group or user names is empty, that means your security permission is not available in your windows, and you have to attach this permission again.To attach the missing security permission, tap on Add option.Now the administrator group has to be attached to the group or user name menu.Choose Administrators in the compiled list and review completely control in the Allow menu.Now tap on OK and then Apply to save changes you have done.5) Copy required files to system32 directoryHere are the steps on how to fix Windows Shell Common Dll has stopped working error through Copy required files to system32 directory:Move to “C:WindowsSystem32” directory.Find joy.cpl and then copy it on the desktop.Right-tap joy.cpl and choose Properties in the menu.Move your cursor to the safety tab and tap on Advanced.Find the Owner section and tap on Change.Here enter your user ID in the field and choose Check Names.If there everything in the correct order, then tap on OK to complete your change and save it.After that, you need to tap on Apply and then on OK to save your changes.After this above process, delete joy.cpl.When your file is deleted visit C:WindowsSysWOW64 directory.Find joy.cpl and then copy it on C:WindowsSystem32 directory.Abigail Smith is a creative person who has been writing blogs and articles about cyber security.
He writes about the latest updates regarding mcafee.com/activate and how it can improve the work experience of users.