


As per the Apple company, multitouch screens on its Mac line is not a priority. However, if you’ve closely paid attention, they never said that multitouch could not be included on a Mac. Don’t worry. You don’t have to recall what you read and stress on the same. Here’s every bit of information you need to know regarding the Touch Bar on the MacBook Pro.
The Touch Bar is currently available on a 13 and 15-inch MacBook Pro, a touch-based mechanism replaced with the keys on your keyboard. The options offered by the bar depends upon the application you’re using. Therefore, it puts forward the best controls that can be used to control a particular app. Additionally, the Touch Bar comes with a Touch ID sensor, which acts as a Power button and can instantly add Apple Pay to the Mac.
If you’re not familiar with the Touch Bar functioning on a MacBook Pro, here’s everything you need to know. So, let’s get started!
As mentioned above, only 13-inch and 15-inch MacBook models include the Touch Bar panel. However, it is expected that the company introduces the OLED panel mechanism in the future. Notably, if you’re a potential buyer of a MacBook Pro, you must always check for deals on websites like Best Buy or Amazon before purchasing the same. In case there are no current deals, get the device from Apple straightaway.
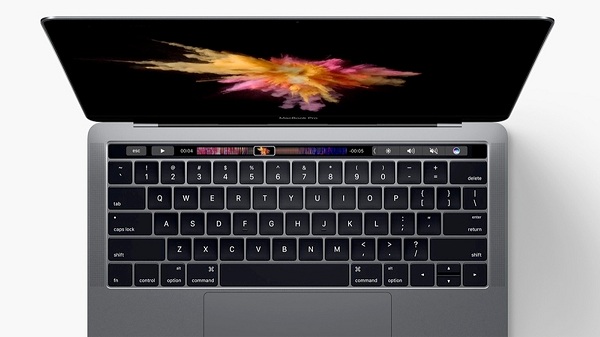
Now, it’s time for the big question everyone has been keenly asking. How does the Touch Bar mechanism work? Well, if you notice closely, you’ll see a strip-shaped light-up panel at the top right corner of the screen that consists of different options, relying upon the app you use. For instance, if you open the Safari browser, it’ll view the most visited websites. If you’re checking your mail, it’ll view instant controls like ‘Replying.’
Additionally, the Touch Bar also offers controls like Brightness, Siri, Volume, etc. The Touch Bar can also support up to ten inputs simultaneously, enabling many more features for third-party apps.
The Power button has been replaced by the Touch Bar and has become the best method to use your Mac. It’s situated to the furthest right of the Touch Bar, which encodes your fingerprint and keeps it disconnected. You can use it to sign in to your account using the MacBook Pro or pay using Apple Pay Online. Furthermore, you can add and name up to three fingerprints for each account, or five fingerprints in total.
Customizing the Touch Bar on the MacBook Pro

A lot of settings can be controlled using the Touch Bar on your MacBook Pro. You can use these tools for built-in or third-party apps. Therefore, to create a better controlling system, you can customize settings by adding or removing some tools. Notably, all the built-in apps offer customizing support; however, a few third-party apps may not do the same. So, you’ll have to check before customizing any third-party applications.
Customizing the Touch Bar for an App

The steps to customize the Touch Bar for an application are:
- Select an app that you want to customize. To change the Control Strip, click on the Mac screen.
- Tap on the ‘View’ button in the menu bar at the top of the screen.
- A drop-down menu will open. Select the ‘Customize Touch Bar’ option.
- Select the tool from the customization panel and drag it towards the bottom of the screen.
After you’ve followed the steps mentioned above, the tool will start appearing in the Touch Bar. You may also reorganize the tools by dragging them to the desired place.
Removing the Tools from the Touch Bar

In case you want to get rid of some of the tools because you don’t need them anymore, they can be easily removed from the Touch Bar. The steps to do the same are:
- Select an app that you want to customize. To change the Control Strip, click on the Mac screen.
- Tap on the ‘View’ button in the menu bar at the top of the screen.
- A drop-down menu will open. Select the ‘Customize Touch Bar’ option.
- Press and hold the tool until the screen starts jiggling.
- A trash icon will start appearing on the screen. Drag the tool to the trash icon.
- Hit the ‘Done’ button.
The icon you wish to remove from the Touch Bar will no longer appear on the Control Strip.
Using and customizing the Touch Bar on your MacBook Pro is no rocket science. Therefore, the tools can be easily added or removed from the Control Strip for each application. Now that you’re familiar with the Touch Bar functioning try it out to make your workflow easier.
John Smith is an inventive person who has been doing intensive research in particular topics and writing blogs and articles on webroot.com/safe and many other related topics. He is a very knowledgeable person with lots of experience.
Source:- https://webrootcom.haribase.com/a-guide-on-using-and-customizing-the-touch-bar-on-macbook-pro/


The MacBook Pro “Core 2 Duo” 2.4 13-Inch (2010) features a 45 nm Complete technical specifications for MacBook Pro, including processor speeds, hard drive space, memory and more.


