During printer usage lifetime, it's eventual that users encounter a paper jam. This article is a standard manual for unloading paper stuck in one or more spaces in a printer. Follow the steps to fix jammed paper from the printer.
The Most Accurate and Easy Steps to Fix Jammed Paper from the Printer
- Be careful Before Starting Troubleshoot
You need to bypass pulling the jammed paper out from below the front cover to fix jammed paper from the printer. If possible, try other means, as this may damage the printer. The best strategy is to pull paper from the backside of the paper tray or printer.
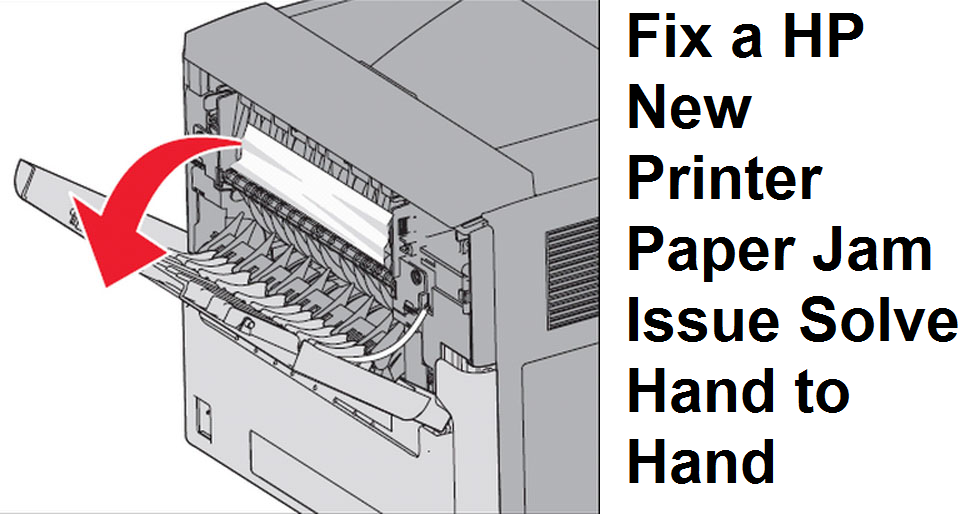
- Steps to Pinpoint and Unload Stuck Paper in the Paper Loading Area
- Pull out any unused paper from the loading tray.
- Click on the "Resume" switch on the printer.
- Start removing stuck paper pieces one at a time from the middle.
- Resolving the Paper Jam from the Back of the Printer
Sometimes, it could be possible the jam is from another part of the printer. Follow the steps below to remove the stuck paper through the device's backside to fix jammed paper from the printer. Generally, the printer device's rear may possess a backside access panel or a double-side printing accessory.
- Steps to Open The Rear Access Cover
- Pinpoint the knob or access switch on the backside of the device.
- If you get a knob, turn it to the open position.
- Open the rear access cover and gently unload the stuck paper.
- Place the rear access cover in its place and close the knob.
- Unlock the Both-Sided Printing Accessory to Resolve the Paper Jam
- Push both release switches on either end of the accessory at once and remove the buttons.
- Now open the panel and gently remove the stuck paper.
- Find and clear any bits of paper that remain within the device.
- Push the accessory back on its housing and plug it into place.
- Press the switch on top of the accessory and remove the door.
- Open the cover panel and gently pull out any stuck paper.
- Now finally, lock the rear module accessory cover.
- Pull Any Stuck Paper Out Under the Front Cover
As a fail-safe to all other options to fix jammed paper from the printer, users may attempt to pull out the jammed paper under the front cover. Perform the step slowly and carefully. This step should always be the last option. Performing this step needs close attention, or you may damage the printer. The device manufacturer may not recommend this step and ask you to contact a service center or expert support team.
Test the Printer After Reloading a Paper
Perform a self-test to print a test paper. Generally, the printer will start printing a test-page if you keep pressing the resume button.
Concluding Words
Most advanced printers are similar in design, and they all possess any of the above modules. Follow these simple steps to fix jammed paper from the printer.
If you face any technical glitches use Instant Help Zilla as Helpdesk


Want a quick guide in order to fix Brother printer displays ‘paper is jammed’.
Then visit the Printer Customer Support website, our will experts assist you with 24/7 online support across the globe without any extra charges across the globe and resolve your printer's issues within a second.
You can check the latest updates on your printer driver free of cost.


Sometimes when you are not satisfied with the performance of a system with Epson Error Code 0xf1 in problem besides paper jammed into the printer.
Meanwhile, since it's natural to happen crucially by the corrupted registry entry, therefore Printer error code experts also try to solve the problem by calling +1-888-480-0288 and online consultation.

Printing issue are often coming forward in the front of the user while they are in between of giving the command.Given is the list of some common printing errors.Printer is not set as default printer.Lack of power in the printer.Ink in the printer is not enough to make the printing possible.Paper jammed in the printer.https://printers-setup.us/canon-printer-setup.html