


The best way to connect a computer, laptop, or game console to a TV is with an HDMI cable, but sometimes there can be no sound on the TV if you use this particular type of connection. If you want to find out what to do and how to fix this problem, this is the right article to read.
As we all know, the HDMI technology allows transferring digital video and audio signal simultaneously from a computer to a television set. However, many users complain about having no sound when they connect their TV to the computer and try to play something like videos or movies. If you also face this problem, this article is for you, because I’m going to show you several ways of fixing it on a Windows operating system.
Why there is no sound
First of all, let’s find out why exactly there is no sound. Actually, there are lots of things that may potentially cause this problem: To begin with, check if your cable is all right: use it to connect another TV or display with built-in speakers to your computer and see what happens. If you hear the sound, you should check your computer settings; if there is no sound, replace the HDMI cable.
Check the sound settings on your TV – the sound might be disabled.
Talking of computers, here are some common things causing sound issues:
- A wrong sound driver or an incompatible playback device are selected in the settings.
- Or, speakers are selected instead of the HDMI port in default sound settings.
The first step to take after you connect the TV is to restart your computer, as this simple fix is usually the best way to eliminate minor issues and software errors.
Method 1. Set the TV as your default playback device
When several sound output devices or sound cards are connected to one computer, there might be a conflict between them. It is quite possible that an HDMI audio output is not enabled automatically because the speakers (external or built-in) are determined as the default output device.
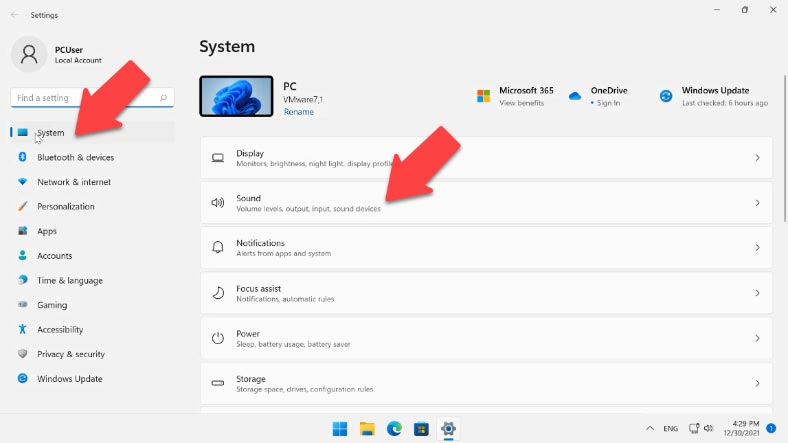
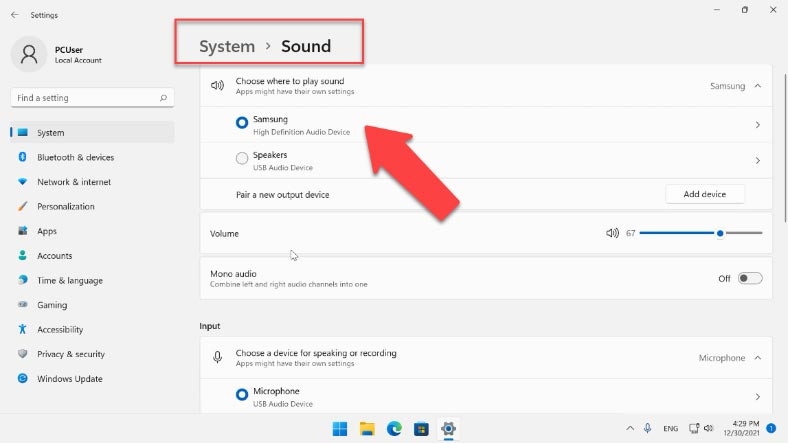
To change this setting, open Settings – System – Sound, and select the proper output device.
In this tab, select the corresponding output device.
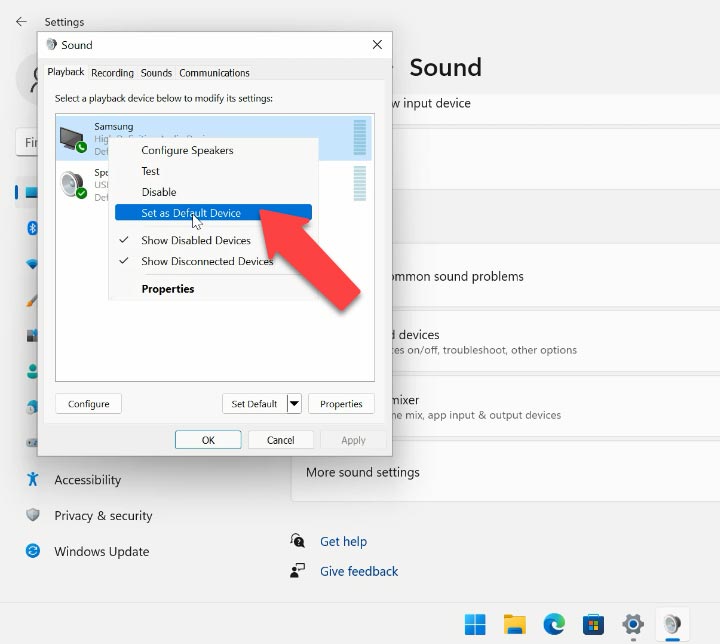
In this section, open “Sound control panel” (More sound settings) – and jump to the tab “Playback”, and your TV should be displayed as one of the choices. Right-click on the TV and choose to set it as default device.
If the TV is not listed here, right-click on an empty area and check if the settings “Show Disabled Devices” and “Show Disconnected Devices” are enabled.

Now right-click on an audio device and check if it is enabled. If it’s not, click here to enable it. After that, click to set it as default choice, “Apply” and OK to save the changes and close the window. After that, check if you can hear the sound. In the same way, you can switch the sound back to the speakers.
Method 2: Update your current drivers
One more thing to cause your sound to disappear when you connect your TV by HDMI is installation of incompatible drivers. So the first step should be to update them. You can do it manually by downloading and installing suitable drivers from the manufacturer’s website – and remember to check that the drivers are compatible with the version of your Windows operating system.
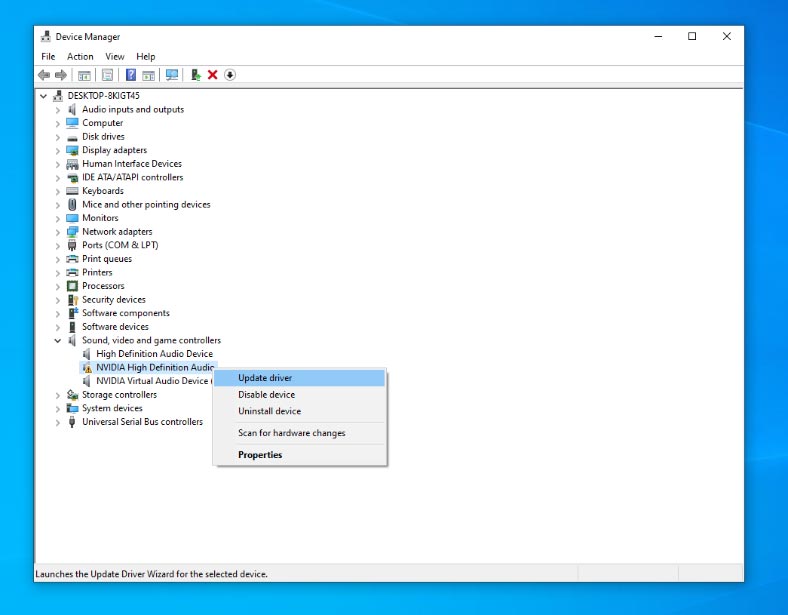
Also, you can update drivers from Device Manager. Right-click on the Start menu and select Device Manager. In the window that opens, select “Sound, video and game controllers”.
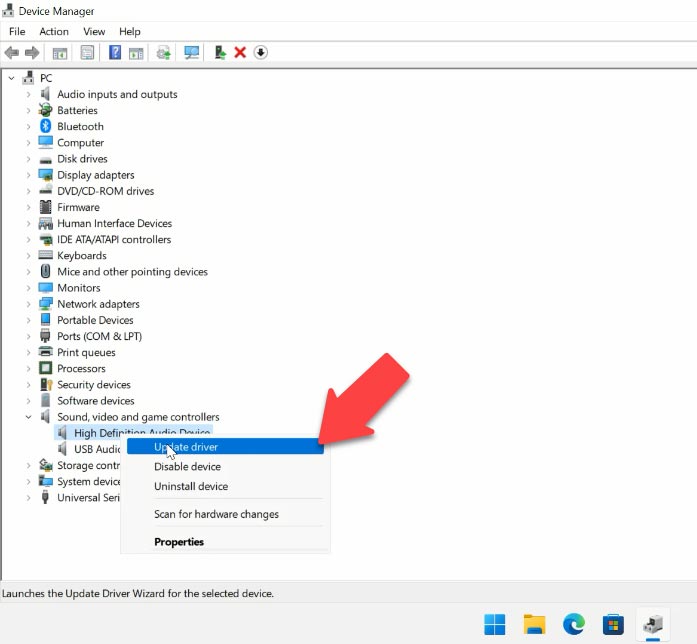
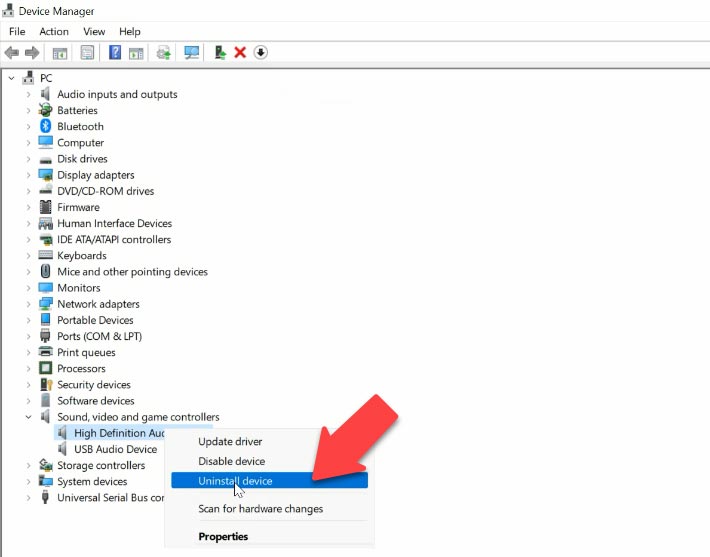
Right-click on the device and choose “Update Driver” – “Search automatically”. Alternatively, right-click on the device and select “Uninstall device” – “Uninstall”.
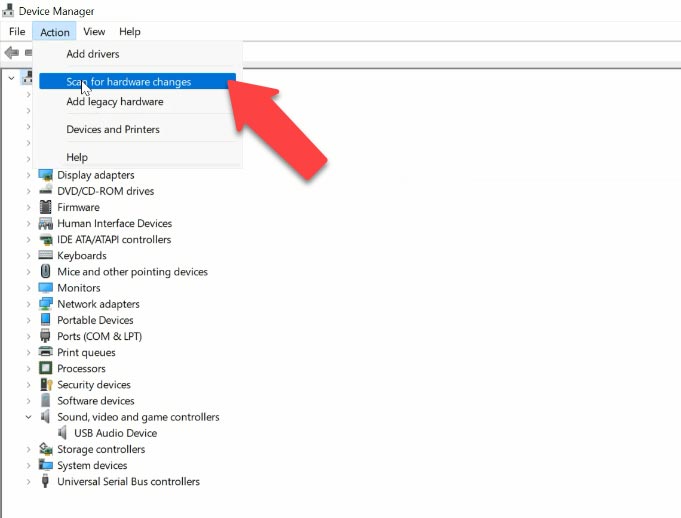
Then look at the menu above and click “Action” – “Scan for hardware changes”. After that, the adapter should be reinstalled, and the sound on your TV connected by HDMI should work properly.
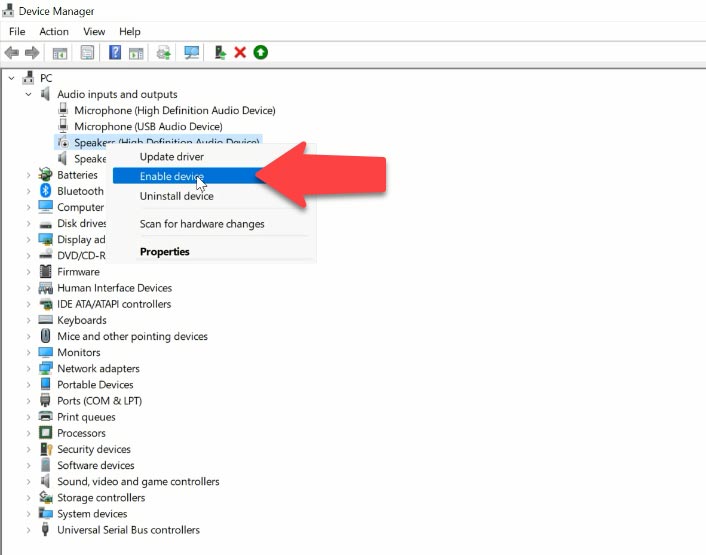
There are more settings to check: expand “Audio inputs and outputs” and if there is a grey arrow next to a device, right-click on it and choose “Enable”.
Another method is to uninstall the device and update the drivers.
After that, jump to “System devices”, expand it and find “High Definition Audio Controller” to see if it is enabled. We strongly recommend against uninstalling it – if you do that and restart the computer, it may not be installed automatically, and the sound might be gone for good.
Another thing to check is to have a look in the “Sound, video and game controllers” and find out of there are items like AMD or NVIDIA High Definition Audio – which depends on the actual graphics adapter installed in your system. Enable it, try updating the driver, or uninstalling it and scanning the configuration for hardware changes.
Method 3: Roll back graphics drivers
Read the full article with all additional video tutorials. Also visit our Youtube channel, there are over 400 video tutorials.


Well, you should rehearse it for a big part of the day to hone your abilities, so you could win more matches and become popular in the gaming community.
In the event that your ps4 is going toward any issue.
We provide the best ps4 repair service in the town.
The most nonstop issue taken a gander at by PlayStation clients is the power issue, which suggests that the control community quits working while the game is being played.
This could be a quick result of an issue in the HDMI wire or port or actually the control center (console) issue.
The console isn’t sending the video or the sound isn’t sent.


If you have bought a speaker and they are placed in front of the TV or beside it, it even costs less than others.
You have got more than a speaker.
Why you should consider a soundbar?
Therefore, it is considered as soundbars under £100 and soundbars under £200.
Consider it remarkable for your LCD as well as for smartphones.
It delivers the dynamic concept of audio input with long-range action.


