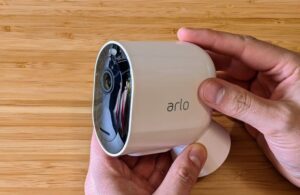
First of all in order to setup the cameras you must need to make sure one thing Arlo cameras only works with Wi-Fi and before the setup you need to make sure to turn off your cellular data in your mobile phone.
You will find cellular data in your iPhone by following these steps.
- Go to i Phone settings
- Look for cellular tap on it
- Now you will see cellular data please turn it off. you did it perfect!

You will find mobile data in your android phone by following these steps.
- Go to your phone settings
- Under settings look for connections
- Tap connections and tap on data usage
- Under data usage you will see mobile data
- Turn it off… you are ready to setup the Arlo cameras.
Special Note :- If by any chance if you forgot to turn off your cellular data or mobile data. you will not be able to setup the cameras. so this is very crucial step because many customers forgot to turn it off and struggling hrs. to get their cameras setup.
Let’s start the Arlo pro 4 camera setup.
- Install the Arlo app from app store (in iPhone) play store ( in android)
- Create an arlo account by clicking on create account in arlo app (use your working email id)
- After creating an account verify your Arlo account by visiting your email and verify the email you received from Arlo
- Login to the Arlo app by using your email and password
- Select add new device
- Select cameras
- Select pro
- Select other or pro 4
- Select continue if it is asking you to connect your phone to Wi-Fi (make sure your phone is connected to 2.4 GHz Wi-Fi network otherwise your camera will not connect
- Insert the battery into first Arlo camera ( if you see the blue light on the camera you are good to go )
- On the next screen it will ask you to enter your Wi-Fi password. enter the correct Wi-Fi password ( otherwise it will not connect )
- On the next screen if the camera light bilking blue select continue
- It will display a QR code on the app
- hold your phone in front of the camera about 4 to 6 inches away and when you hear the chime sound you are good to go. (if there is no chime make sure camera is blinking blue light- if there is no blue light blinking then you need to press the sync button on the camera for 2 to 3 seconds – for that please remove the housing from camera and you will see a small sync button in black color press and hold it about 2 to 3 seconds and then release it. you will see blue light is blinking now )
- Scan the QR code when you hear the chime sound select continue
- It will start looking your camera 9 it will take about 1 to 2 min.
- On the next screen it will ask you to give a name to your camera
- Give the name to your camera wherever you want to mount it.


