


Table Of Content
- Step 1: Unpack the Printer Box
- Step 2: Install the Epson Printer
- Step 3: Ensure to Connect Both Device Cables Properly
- Step 4: Connect Epson Wireless Printer to Windows/ Mac
- Step 5: Take a Print Test
Other Section

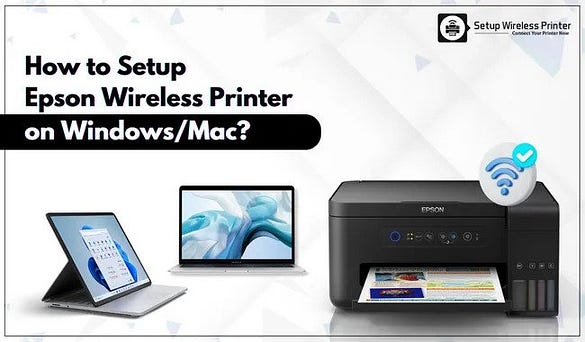
Have you just bought a brand new Epson printer and want to set it up? Well, it’s easy. You can do it effortlessly in just a few steps. Don’t forget to read your printer instructions manual, as it will help you to understand your Epson printer model. This blog will guide you on the wireless printer setup on Windows and Mac. So, be here to learn how to connect Epson wireless printer on Windows and Mac.
Step 1: Unpack the Printer Box
The first step is to unbox your brand-new Epson printer. Remove all the protective coverings and tapes from outside and inside the box. Check the printer for any kind of damage or defect. Also, check the included accessories like USB cable, power cord, etc. If you check any defective item, immediately contact the manufacturer or the vendor.
Step 2: Install the Epson Printer
Once you check everything inside the box, you need to install the Epson printer in a safe, cool, and dry place nearby a power outlet. Ensure that the surface is flat where you’re installing your printer. For a detailed guide on downloading Epson printer drivers, visit the support page on our website for a free consultation with our experts.
Step 3: Ensure to Connect Both Device Cables Properly
When you’re done installing your printer in a safe place, continue by connecting it to your device. Use a power cord that’s included in your printer’s box. Connect one end to the printer’s USB interface and another to the computer’s USB interface. After that, connect both devices to a power cord and connect them to a power source. Then, turn on both devices.
Step 4: Connect Epson Wireless Printer to Windows/ Mac
After you have connected your computer to the power source, it’s time to add the printer to your devices. We will see steps for connecting printers to Windows and Mac individually. Let’s see them.
For Windows
- In the first step, press Windows and Q keys together to open Cortana.
- Then, search Printer in the search box and hit Enter.
- The Control Panel will be open with the connected devices and printers.
- Find your printer. If you cannot find your printer, check if your printer is turned on or not. Then, try again.
- Now, tap Add a Printer or Scanner and continue.
- After that, choose the printer from the list.
- Double-click on your printer’s name and tap on Setup.
- Next, scroll down to Wi-Fi Settings.
- Then, choose Wi-Fi Setup and then select the Wi-Fi Setup Wizard.
- Now select your network name and tap on it.
- Type your password when asked and tap on Connect.
- Let the printer connect to the Wi-Fi.
Finally, you have set up your Epson wireless printer on Windows.
For Mac
- On your Mac, download the Epson Connect printer setup utility app.
- Then, run this application and tap Continue.
- Now, accept the software license and tap Continue.
- After that, click Install and click Agree to accept the Terms and Conditions.
- Once you finish the installation, choose your product and tap Next.
- After that, choose Printer Registration and move forward.
- You’ll observe a box saying, Register a Printer to Epson Connect; tap OK.
- Click Next once again after viewing the terms and conditions.
- Now you have to choose an option to complete your printer setup.
- If you’re a new user, create a new Epson Connect account.
- If you’re an existing user, tap on I already have an account and close the page.
- You can choose activate scan for cloud and remote print to enable the scan for cloud and print services.
When your Epson printer is connected to the Epson connect, go to Settings and choose Wi-Fi as the wireless connectivity option on your PC. Provide the password for the wireless network when asked, and your work is over.
Step 5: Take a Print Test
As a last step, don’t forget to take a print test to check if the Setup was done correctly or not. Use any random documents and click print. If you observe any issue in print, it means you have not done your connection properly. When you know how to connect Epson wireless printer, try to set up your Epson printer and start printing your files.
To get a free consultation from experts, go ahead to the support page on our setupwirelessprinter.com website right away.
Frequently Asked Questions
Question
Why is My Epson Printer Not Connecting to Wi-Fi?
Your Epson printer may not connect to Wi-Fi due to certain reasons. Whenever such an issue arises, turn off the firewall or any antivirus software running on your router. Ensure that your router has access restrictions like MAC address filtering etc. If access restrictions are present, you should add your printer’s MAC address to the address list of the router.
Question
What is the Epson Connect App?
Epson Connect app is an Epson app that allows you to print and scan through your mobile device, mobile, tablet, or laptop from anywhere. This app is personalized for Epson printers. Also, you can use this app for scanning a file and uploading it to another location, like a Cloud account. You can check out the Epson Connect services by visiting its website.
Question
What Do I Need for Epson Wireless Printer Setup?
To set up your Epson wireless printer, you need a stable internet connection and your device, either Windows or Mac. To set them up, you need to connect both of your devices to each other via a USB cable and to the power outlet. Then, add the printer to your device by using the respective printer settings on your devices. Don’t forget to download and install the printer drivers for the Epson printer.
Source:- how to connect Epson wireless printer


Epson is one of the best brands of Printers that has gained the most attention World-wide due to its exceptional features.
It has taken a special place in the heart of many people.
Most of the Epson printers are known as All-in-one Printers as they can Print, Fax, Scan, and Copy at a time.
You can print the documents even at your home, offices, schools, etc.
Epson Connect Printer Setup is basically designed to enable Epson printers so that you can print emails, documents, as well as photos by using any device which can send an email.
It is an amazing software which you need to download on your PC.


