


Welcome back, guys! Look what I made today: Personalized Cricut Thank You cards. I am creating this craft to appreciate my grandfather, as he has done many things for my family. Adding a personal touch to the card will make it look like it was made out of love and respect. Beyond the shadow of a doubt, greeting someone verbally is nice, but expressing it with words directly touches the heart.
I am a little of an introverted person and don’t share my feelings with anyone easily, but this time, I have made up my mind and will value his sacrifice to satisfy our unnecessary demands. After making the final decision, it’s clear that I will need some crafting items and a complete process to complete the craft.
Stay with this blog until the end and collect full-fledged info about making this custom project with the cut-die machine.
Step 1: Draw a Thank You Card on Cricut Design Space
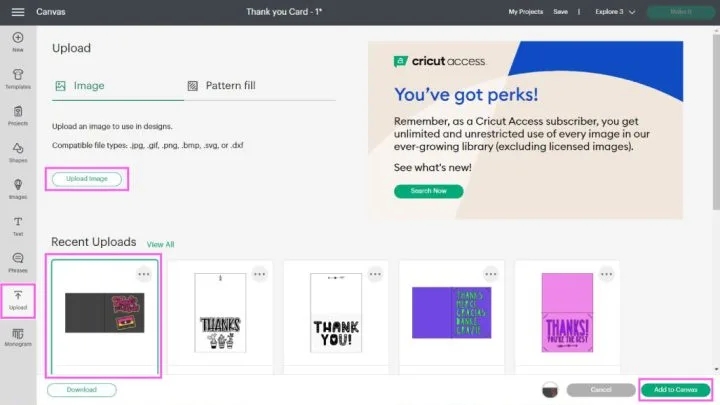
Commence the method of designing this do-it-yourself project by going to the Cricut sign-in page and creating your account. Now, open the app and press the New Project on the left side of the page. After a few seconds, you will connect to the canvas, press Upload and your image from the Recent Uploads, and tick Add to Canvas.
Before taking a step towards cutting the card:
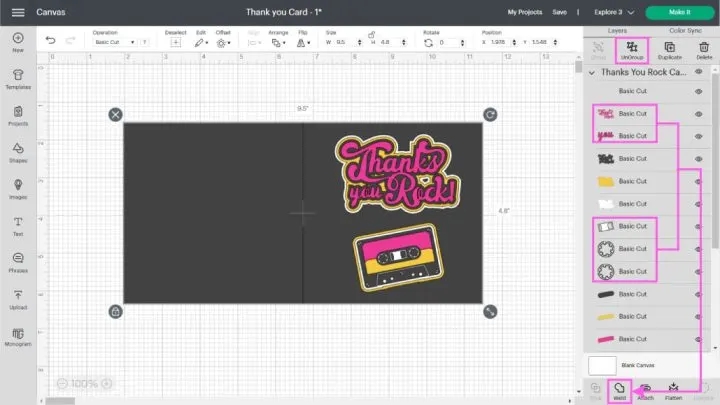
- Decrease your card size and ensure that the details are visible.
- Select the card and click Ungroup to edit each layer of this DIY project.
- Choose Thanks You Rock, press the Weld button, and repeat the same with the white layers inside the cassette.
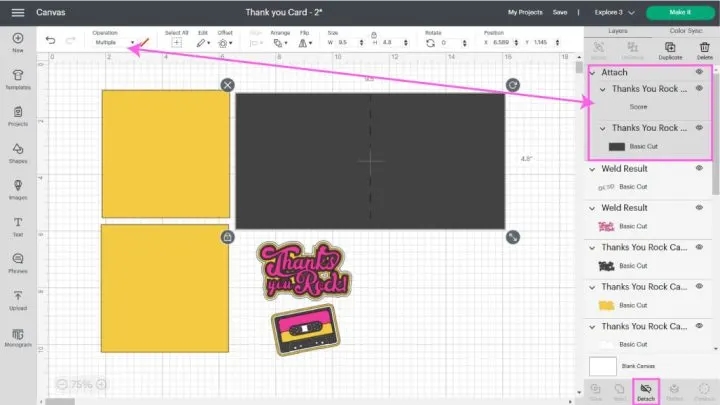
In the middle of the card, you will see a straight dotted line; that’s where you will score to make the card easily foldable. After observing that, select the line given under the Layers area, tick Operation, and choose Score from the list. Then, select both layers to connect your Cricut Thank You cards with the score line and press the Attach option.
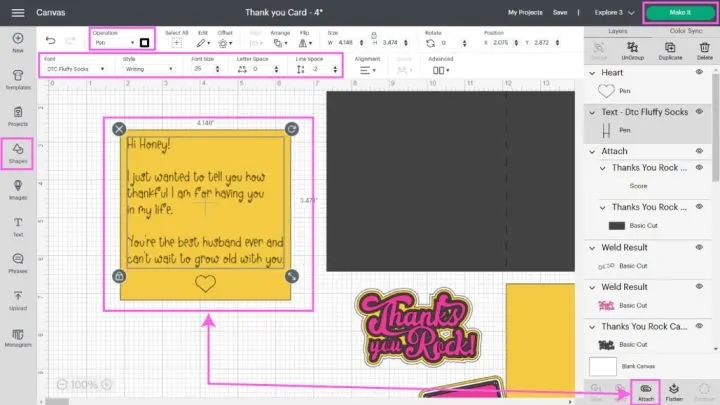
At this time, write the message of your wish, change its color, font, and size, and add a heart at the end. Next, return to operation dropbox, tick the Pen from the list, and press the Attach option. After selecting the option, press the Make It and share the card with the Cricut machine.
Step 2: Choose Your Material and Start Cutting
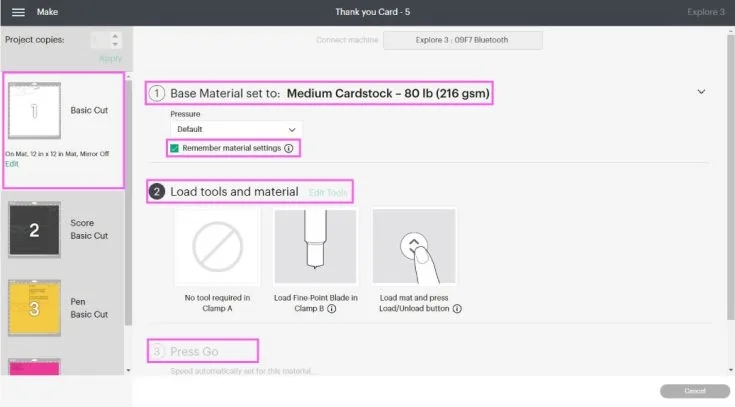
After finishing your design, choose On Mat, followed by the Continue option, and start selecting material for your craft. In order to design this project properly, your machine will perform four different kinds of cuts. For this project, choose Medium Cardstock (80lb) and load the tools and materials depending on the cut you will do.
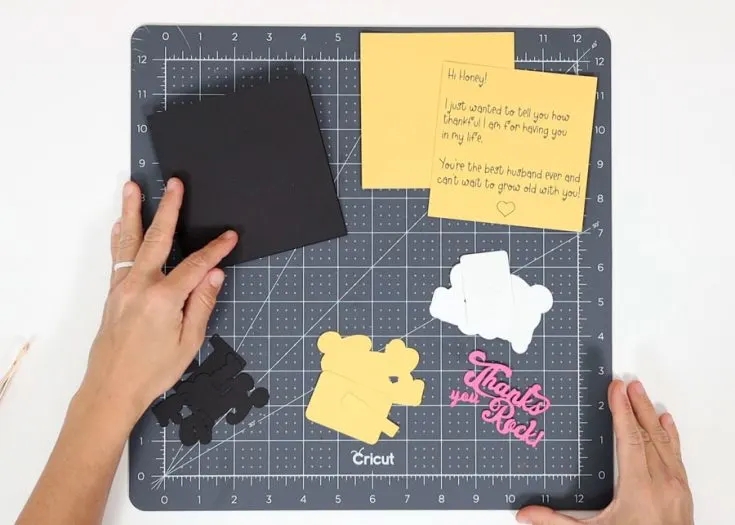
Remove the plastic sheet from your Cricut material and place it on the cutting mat using the brayer tool to remove the bubbles and spaces. Please turn on your craft plotter and insert the mat inside it. After finishing the cutting process, bend your mat and release the design. Follow the same steps with the rest of the mats until you get all the pieces of your Cricut Thank You cards.
Step 3: Stick All the Pieces Together
Give a pat on your shoulder as you have smoothly completed the most crucial steps of designing this custom-made project. It’s time to connect all the pieces and make this personalized project from a craft plotter. Start sticking the pieces by taking the Thank You Rock word.
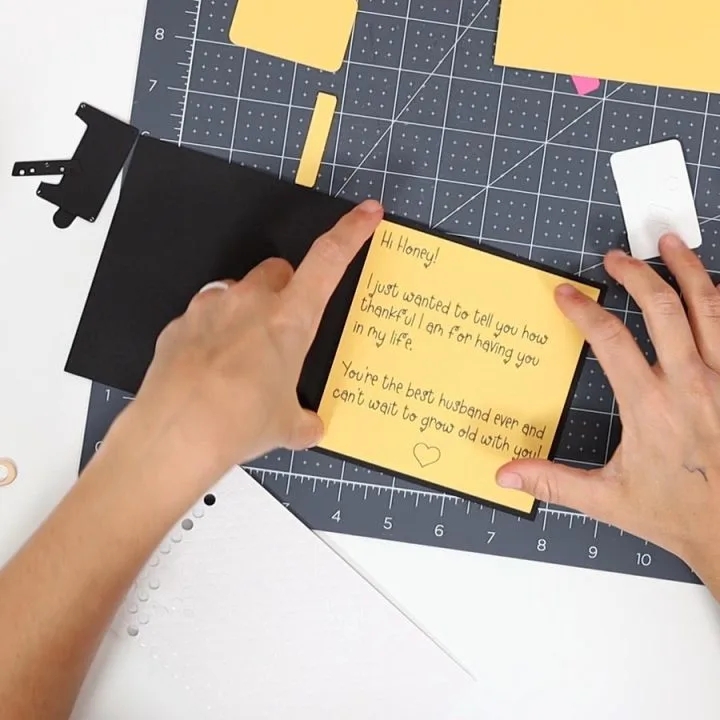
Next, stick the square inside your card and the cassette design. If you need clarification, go to Design Space and check the sequence. Now, give rest to your Cricut Thank You cards and let all the pieces stick together. There you go! Keep your head up and shine like a star in the community after sharing it.

Conclusion
There are many other ways to give perfect form to this custom-made project elegantly. But this is my favorite as it gets complete using fewer crafting supplies and is easily understandable. Apart from that, any fresher or expert can make it out of any Cricut cutting machine within a few minutes. Also, you can start your own business by making and selling Cricut Thank You cards in your society.
Frequently Asked Questions
Question: How Do I Make a Card With Cricut Joy?
Answer: If you have Cricut Joy and want to design any card, then go through the steps given below:
- First, select the Thank You created from the Design Space application.
- Second, peel off the protective sheet of the card and stick its front part on it.
- Third, load the mat into the Joy machine and let the cutting process begin.
- At last, remove the extra material with the scraper tool, and your card is ready.
Question: On What Occasion Can I Create Cards With My Cricut?
Answer: Cricut is such a fantastic craft plotter so you can make different cards from it. The ideas include:
- Valentine’s Day
- Birthday
- Graduation ceremony
- Mother & Father’s Day
- Halloween party
- Thanksgiving party
- Christmas
Question: Is It Compulsory to Make a Card in Cricut Design Space?
Answer: Since the Cricut cutting machine is compatible with the Design Space app, all DIYers must create card designs. You will find multiple images, fonts, templates, and ready-to-make projects. Also, you will enjoy the Cricut Access plan, where you will get to use an ever-growing library offering multiple images, fonts, and customized projects.
Source URL: - Cricut Thank You Cards


