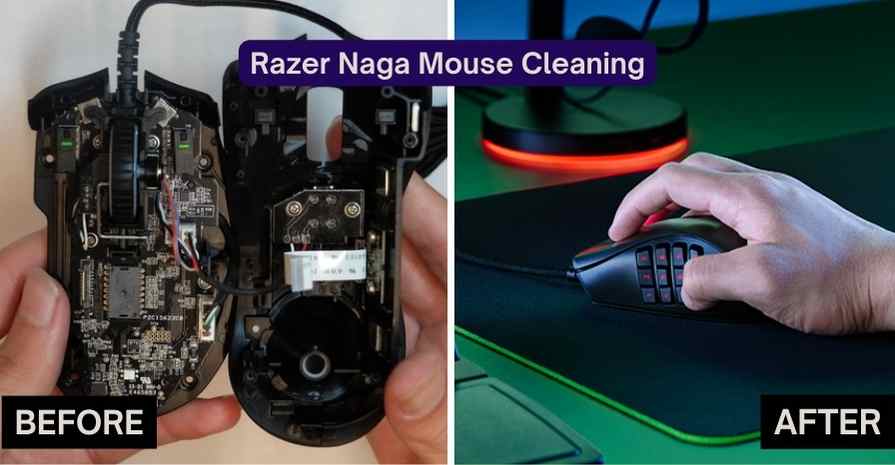
No matter whether you’re a hardcore gaming enthusiast or a casual player, you can’t deny the importance of a specialized gaming mouse. Moreover, keeping it clean and maintained for better functionality is another essentiality that can’t be avoided.
Your Razer Naga mouse is susceptible to accumulated dirt, grime, oil, etc. with time, which can simply affect its functionality and responsiveness. This can also impact negatively on your overall gaming experience. This is where learning how to clean a Razer Naga Mouse becomes even more crucial.
Importance of Maintaining Cleanliness For Smooth Operation
Do you know why optimal Razer Naga Mouse cleaning is important for your gaming ? Its requirement is not just limited to optimal functionality but also for several other reasons. So, what are those reasons? Have a look at the following:
- Optimal Performance: If you want the buttons, moving parts, and sensors of the gaming mouse to work without any hindrance, then it’s necessary to keep the mouse clean and optimally maintained. By this, you may have exceptional performance in your gaming tasks.
- Longevity: Dirt accumulation and debris particles are responsible for premature damage to the components. By maintaining the best cleaning schedule, you can eliminate such risks and ensure a better lifespan without any need for replacements.
- Precision and Accuracy: When dirt and residual particles exist on the surface of the mouse components, they hinder its ability to track the movements efficiently. Cleaning such obstructions ensures that the cursor moves precisely and you get the best in-game actions.
- Comfort: Oil and debris buildup can be extremely uncomfortable to work with, especially when you love to play for an extended period. When your mouse is clean, it’ll not only function smoothly but provide you with a more comfortable experience.
- Malfunction Prevention: Dirt and oil buildup on your mouse can lead to overall malfunction. This may include erratic cursor movements, sticky buttons, etc. To avoid these issues and have a flawless operation, you’ll need to keep the Razer Naga gaming mouse appropriately clean.

The To-do Steps:
While your cleaning process will begin with the disassembly of the components, all of the mouse components can be cleaned thoroughly. The major steps are as mentioned below:
Exterior Cleaning
- Foremost, you may need to remove the Razer Naga mouse from the plugs and computer.
- Consider using a dry, soft cloth to easily remove the loose dirt particles from the exterior surface. Give proper attention to each nook and cranny of your gaming mouse.
- If there are stubborn residual components, then you may need a cleanser like rubbing alcohol. Dampen a soft cloth in it and apply the same all over the exterior surface.
- While carrying out this step, you should focus more on buttons, grip areas, and so on. Such regions are more likely to accumulate residual components.
- Once cleaned completely, you may keep it in a separate area to get dry.
Cleaning the Mouse Feet
- To begin the cleaning process, a visual inspection of the mouse’s feet is required. Check for the excessiveness of dirt and residual buildup on the mouse feet.
- Simply take a cotton swab and dip it in the container having rubbing alcohol. When it’s dampened, clean the mouse feet using the same.
- Keep your hands gentle while rubbing the cotton swab around the edges and sides of the mouse feet to remove all the dirt particles perfectly.
- Let it dry while you’re cleaning other components of the gaming mouse.
Deep Cleaning the Sensor
- You can’t clean the sensor part using rubbing alcohol as it can damage them. Instead, a compressed air source is the best alternative to this.
- Use such a source of compressed air and blow away all the dirt and dust particles from the sensor area.
- If you still notice dirt and dust components, consider cleaning the sensor with a dry microfiber cloth.
- If the dust particles and spots are stubborn, then you may take the help of distilled water to remove them.
- Ensure that the water quantity is the bare minimum so that there is no negative impact or damage to the sensor’s functionality.
- Until now, each part of the sensor must have been cleaned. If not, you can repeat the steps to get satisfactory results.
What To Avoid?
Now that you know how to clean a Razer Naga Mouse in some easy steps, you should also be aware of some mistakes and certainties to avoid for successful cleaning results. Some of those considerations include these:
- You must avoid using any sort of harsh cleaning agent including ammonia, bleach, or other abrasive cleansers. All of these are harmful to the mouse and its surface.
- Don’t soak or submerge the components of the Razer Naga mouse in water or any cleaning solution. Doing so will harm the components that can’t be repaired.
- Whenever you’re dealing with the mouse, try to be extremely gentle. Don’t put excessive pressure on sensors or buttons. Gentle cleaning force and methods are appropriate for these components.
- You should also avoid using sharp tools like knives and other metal tools when dealing with the Razer Naga mouse to prevent damage or severe issues.
- If you don’t notice excessive dirt and residual particles, consider not to disassemble the components. Unnecessary disassembling may go wrong and likely result in incorrect reassembling.


