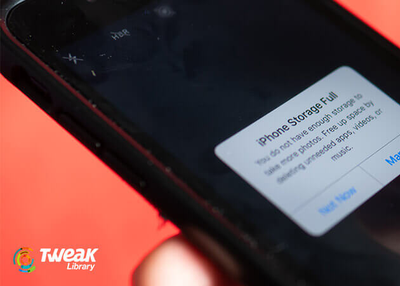
Transferring photos from iPhone to Mac is very easy with multiple options available. But, what if you own a Windows PC, and wish your pictures on both the devices? Do you have to compromise, just because you do not own a Mac?
Well, no. Windows users can also transfer pictures from iPhone to their PC. The process of moving photos from the iPhone to Windows is just as easy as it is with a Mac. You can move these photos over a USB-to-Lightning, as well as iCloud Photo Library. Interestingly, yes, it is possible to access iCloud on a Windows PC.
Keep reading to know how to transfer photos from your iPhone to your PC.

Download iTunes
Although Apple has made it feasible for you to establish a connection between an iPhone and Android, however, the process requires a few downloads and installs. That said, to transfer photos over USB, first, you need to install iTunes for Windows 10 onto your PC. By doing this, your PC will be able to recognize your iPhone in the File Explorer.
Connecting Your iPhone
Once your iPhone is plugged into your Windows PC, you will need to follow a few more steps:
Step 1: Use a USB-to-Lightning cable to connect your iPhone to the PC.
Step 2: Now, tap Trust on your iPhone.
Step 3: You will be prompted to enter your passcode on your iPhone.
Once done, you should be able to transfer photos to your Windows PC.
How to Move Photos From Your iPhone to Your PC With the Windows 10 Photos App?
Step 1: Go to Photos on your PC through the Start Menu, desktop, or taskbar while your iPhone is connected to your PC.
Step 2: Select Import in the upper-right corner.
Step 3: Now, click on the option named “From a USB device.”
Step 4: Select the photos that you wish to import to your PC.
Step 5: You can choose to click on “Items since last import,” if you wantto import all the photos you have taken since the last time you did this, or All items to simply import all of your photos.
Step 6: Hit Import.
How to Move Photos From Your iPhone to Your PC With File Explorer?
Step 1: Open File Explorer on your PC from your Start Menu, desktop, or taskbar.
Step 2: Open This PC in the sidebar.
Step 3: Choose your iPhone under Devices and drives.
Step 4: Click Internal Storage.
Step 5: Select the DCIM folder.
Step 6: Now, click an image to select it. If you want to select multiple photos, you may click while holding the Ctrl key on your PC’s keyboard.
Step 7: Click Copy to the toolbar.
Step 8: Open Choose location… to select the location, where you want to store the transferred photos in your PC.
Step 9: Select the location where you want the image or images to be stored.
Step 10: Select Copy.
Your photos will be successfully transferred from your iPhone to the Photos app on Windows. Remember not to unplug your iPhone until the copying process is complete.
How to Move Photos From Your iPhone to Your PC Over iCloud?
May it be anything; a wireless method is more convenient. If you also wish to transfer the photos from your iPhone to PC, you can do it wirelessly over the cloud. Thanks to Apple for making an iCloud app, particularly for PCs. This application allows you to set up features like iCloud Photo Library and iCloud Drive on Windows.
We hope that you will now be able to transfer your photos from iPhone to Windows in a snap.
Harry Williams is an inventive person who has been doing intensive research in particular topics and writing blogs and articles for Wire IT Solutions on Norton, Webroot, McAfee, Microsoft Office and many other related topics. He is a very knowledgeable person with lots of experience. To get in touch with the internet security service provider, just dial 8889967333.
SOURCE : Transfer Photos From Your iPhone to Your PC , Wire IT Solutions

The reality of our device-rich world is that we will, at times, have a smartphone or tab that does not have the same operating system as the computer or laptop.
To make things worse, you may have pictures on your Mac that you want to move to your iPhone.
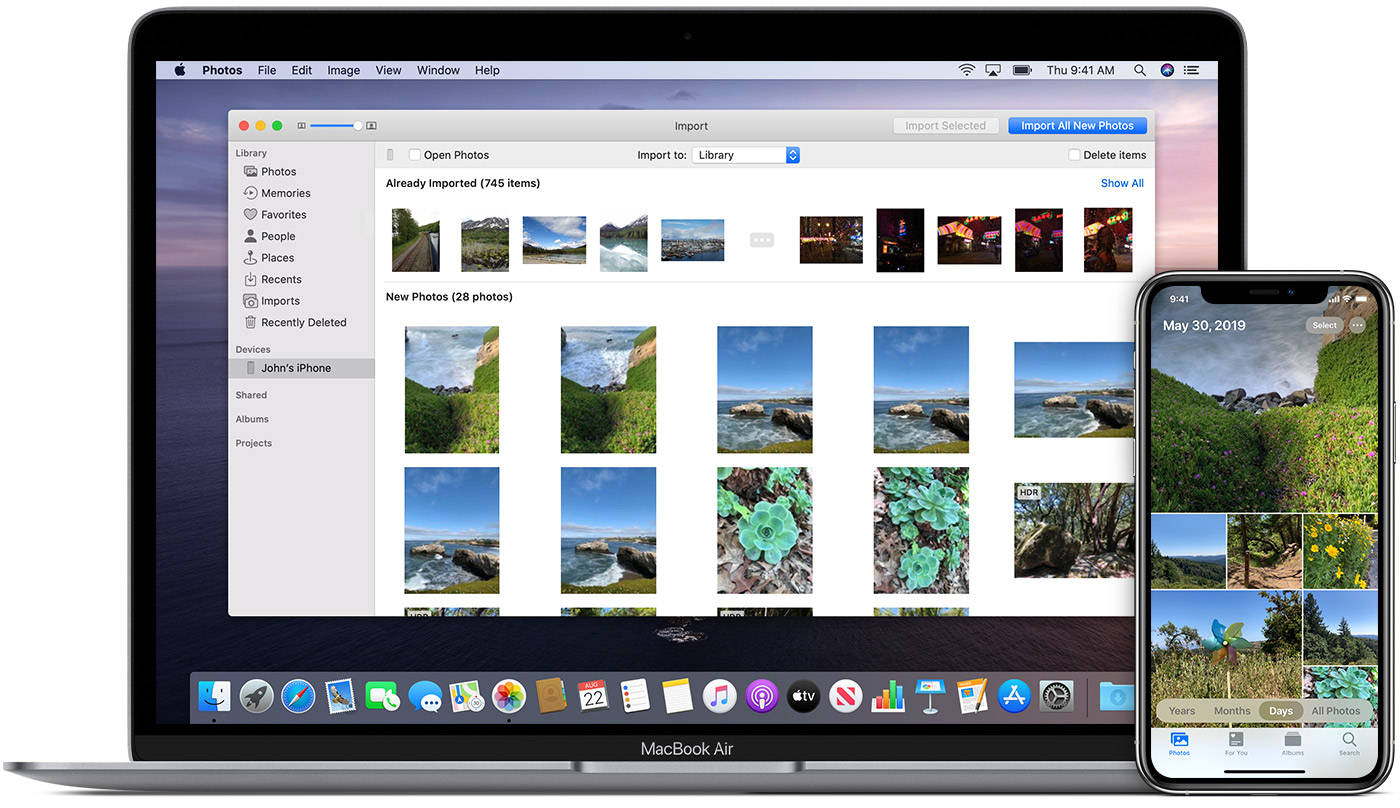
Read on and check out the best ways to transfer photos from your Mac device to iPhone.Using iCloud Photo LibraryFollow the stepwise instructions given below:Launch the application of Photos on your Mac.Then choose the Photos option in the upper left and pick the Preferences option.You should choose the iCloud section.Don’t forget to mark the box of iCloud Photos.Uploading the Photos from iCloud.comFollow the stepwise instructions given below:You have to ensure that you have enabled iCloud Photos on the iOS devices.Then go to ‘iCloud.com’ and log in using your Apple ID.You should choose the button for Photos.Once everything gets loaded, select the button of Upload.After that, click on the images option.Choose your preferred hard drive.
Using AirDrop to Move Images from MacBook to iPhoneYou can use AirDrop to move images from your MacBook to iPhone by following these steps provided below:Invoke the Finder on the Mac.Then launch a fresh Finder tab or screen so that you can see two Finder locations simultaneously.You should find and choose the videos and photos you would like to move to the iPad or iPhone.Once you reach the Finder tab or screen, select the ‘AirDrop’ option.Go to the iPad or iPhone, ensure that it’s awake and unlocked.Don’t forget to enable the ‘AirDrop receiving’ option on iPad or iPhone and tweak it to Everyone.Click on Accept, if prompted.Use Finder or iTunesHere are the steps you can follow:Connect the iPad or iPhone to the Mac.Open the Finder, in case it does not launch automatically.You should choose your iPhone or iPad.Choose the Photos section.Thereafter, mark the Sync Photos box.You have to choose the source of the pictures that you would like to sync.Select either of the following options: Sync Selected Folders or Sync All Folders.Pick the Folder you would like to sync from the ‘chosen source.’Later, tick the ‘Include videos’ box, in case you want.Now, tap on the Sync button.The reality of our device-rich world is that we will, at times, have a smartphone or tab that does not have the same operating system as the computer or laptop.
Read on and check out the best ways to transfer photos from your Mac device to iPhone.Using iCloud Photo LibraryFollow the stepwise instructions given below:Launch the application of Photos on your Mac.Then choose the Photos option in the upper left and pick the Preferences option.You should choose the iCloud section.Don’t forget to mark the box of iCloud Photos.Uploading the Photos from iCloud.comFollow the stepwise instructions given below:You have to ensure that you have enabled iCloud Photos on the iOS devices.Then go to ‘iCloud.com’ and log in using your Apple ID.You should choose the button for Photos.Once everything gets loaded, select the button of Upload.After that, click on the images option.Choose your preferred hard drive.Using AirDrop to Move Images from MacBook to iPhoneYou can use AirDrop to move images from your MacBook to iPhone by following these steps provided below:Invoke the Finder on the Mac.Then launch a fresh Finder tab or screen so that you can see two Finder locations simultaneously.You should find and choose the videos and photos you would like to move to the iPad or iPhone.Once you reach the Finder tab or screen, select the ‘AirDrop’ option.Go to the iPad or iPhone, ensure that it’s awake and unlocked.Don’t forget to enable the ‘AirDrop receiving’ option on iPad or iPhone and tweak it to Everyone.Click on Accept, if prompted.Use Finder or iTunesHere are the steps you can follow:Connect the iPad or iPhone to the Mac.Open the Finder, in case it does not launch automatically.You should choose your iPhone or iPad.Choose the Photos section.Thereafter, mark the Sync Photos box.You have to choose the source of the pictures that you would like to sync.Select either of the following options: Sync Selected Folders or Sync All Folders.Pick the Folder you would like to sync from the ‘chosen source.’Later, tick the ‘Include videos’ box, in case you want.Now, tap on the Sync button.
Source:- How to Move Photos from Mac to iPhone?

Apple’s 10.0 iOS release upgrades device interoperability and expands enterprise mobility management functionality of iPhone, iPad and other Apple devices.

It seems that Apple is having the same problem as the Google Pixel 2 XL with the new iPhone X. Burn in and blue shifting problems yet again.

If you want Apple iPhone, then you should consider the Electronic Gadgets Store as it offers Apple iPhone for sale with a guarantee.

In this particular blog, you will get to know about the threat to the Apple’s IPhone market and decreasing demand of IPhones. Although Apple stands out when we speak of tech giants, its products are demonstrating a lack of innovation.

Being an idol to most of the iPhone app development companies, Apple has launched a series of iPhones.
Every time it launches a new model, Apple offers something surprising for the users.
Every new and advanced version compels users to wait for the next one.
And, it is, of course, worth the wait for the users as they get a chance to use some exceptional app functionalities.
Both these versions will be upgraded a bit more than the previous iPhone 7.
And, it is also predicted that the change will make the iPhone 7s a bit thicker than its previous version.