Many discussions are going around regarding the release of two new Pixel 5 and Pixel 4a 5G phones. Not only did Google introduce the latest phone models, but they also came up with a Photos Editor that has a whole new range of editing features.
There are unlimited photo editing third-party applications available, but Google Photos Editor includes advanced tools, including portrait editing on any image, granular manual controls, and much more.
If you’re an Android user, using the Google Photos Editor is an excellent way of editing pictures and enhancing their quality. If you’re keen to know more about the same, below is a guide on using the Photos Editor. Read along to learn more!
How to Use the Manual Controls on the New Google Photos Editor?
Editing your pictures becomes the easiest job with the new Google Photos Editor. Follow the steps mentioned below to control the settings of the images using the editor manually.
- Launch the Google Photos App.
- Select and open any picture to edit.
- Click on the editing icon present at the bottom of the screen.
- All the editing modes will appear at the bottom. You can slide sideways to view more editing options.
- Click on any editing mode, for instance, Adjust.
- Locate the editing control and tap on the same. These controls include Brightness, White Point, Contrast, Highlights, Black point, Saturation, Warmth, tint, Shadows, Blue tone, Skin tone, and Vignette.
- A slider for the control will appear. Drag the slider to increase or decrease the settings of the control, for instance, Brightness.
- Once you’ve adjusted the slider, hit the ‘Done’ button.
- Also, after you make adjustments with all other modes, click on the ‘Save’ option.
That was easy, isn’t it? Even though all the adjustments are made manually, you can create a masterpiece out of an ordinary picture.
Portrait Lighting Effects on the New Google Photos Editor
Portrait Lighting Effects is one of the most exciting features introduced by Google. Portrait Lighting effects help you create remarkable pictures even after a photo is clicked. The feature is available along with manual controls in the editing menu. These features too have sliders for their adjustments that enable you to adjust the settings as per your convenience.
As mentioned above, the best part is being able to use an image even from years ago to edit with the portrait lighting features.
Isn’t it exciting? Google Photos Editor has changed the definition of photo editing by introducing its advanced features that no other application offers. Update the Photos Editor to its latest version available and share your best-edited pictures on social media.
Devin Smith is a creative person who has been writing blogs and articles about cybersecurity and utility software programs. He writes about the latest updates regarding norton.com/setup and how it can improve the work experience of users. His articles have been published in many popular e-magazines, blogs, and websites.
Source:-https://my2norton.com/a-guide-on-using-the-new-google-photos-editor/


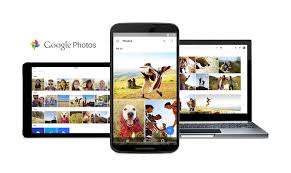
Google Photos App is a shelter for all your media files, including photos and videos organized by default and ever-ready to share.
The app provides free and unlimited space to the users to store their data.
Its free storage is one primary reason for the majority of the people to choose Google Photos over any other application.Google has now come up with a new powerful editing feature in the Photos app on Android.
Also, Google has added a separate ‘Suggestions’ section in the editor that gives the user suggestions regarding the picture they’re editing, powered by Machine Learning (ML).
These suggestions include setting brightness, portrait effects, and contrast, which helps the user to bring up fantastic editing results.Google further mentioned that they’ve already added features like Enhance black and white portraits and Color Pop; however, they’re planning to bring new features to Pixel devices in the upcoming months.The new Google editing feature enables you to customize a picture as per your liking.
The editor also offers you to use additional granular edits like warmth, saturation, blur, and much more.

In part 2 of this video, I continue the countdown of my 10 favorite things about the new Google Ads Editor.

Google Photos is the best way to manage, compile, and store all your videos and photos at a single place.
Not just this, you do not even get any notification if the link of your album is public, or when anybody joins or views or even saves anything from the album.
As Google fails to help, there are some tricks we know that you can use to protect your photos.
From the Options tab, turn off the toggle that says ‘Link sharing’.
You will not have to worry about those who joined the album using your link, as the existing members will stay joined within the album.
For this, you must keep a watch on the joining members as you share your link and be quick in turning it off as soon as everyone joins.

Google Photos is considered the best storage option for saving your photos without any fear of misplacing.
But there are lots of circumstances that have been seen where users complain that their images are not available in the store or they deleted photos mistakenly from a particular folder available in Google Photos.
But Google Photos allow you to recover your deleted photos within a 60 days time period because deleted photos go to the Trash folder from where you can easily recover them.
If you don’t know how to recover Google Photos after 60 days or within this time period, then you can follow the mentioned instructions to recover your photos on multiple devices.The text above is a summary, you can read full article here

If you are the one whose gallery is always overloaded with photos and videos, then the Google Photos app is for you.
Uploading your pictures on the Google Photos app will not only help you free up space from your phone but also organize those beautiful photos.
The “High Quality” is the most preferred option, as it uploads your images at 16 MP and videos at 1080p without compromising your Google storage.
This might take a while, depending on the number of media you are uploading.Upload Your MemoriesYou must not forget to backup your photos and videos on this app.
On Android, open the app, tap on the triple-dot menu, and choose Settings followed by “Backup & Sync.” Turn on the toggle switch for “Backup & Sync” to ensure all the new photos and videos are backed up automatically every time you open the Google Photos app.Similarly, for iOS, start by opening the app, then tap on the hamburger menu, followed by Settings.
All you need to do is open the app, and you will find your newest photos on top.