


Drivers constitute the most essential aspect of a printing device, and the absence of these can mean you are not able to use the device.
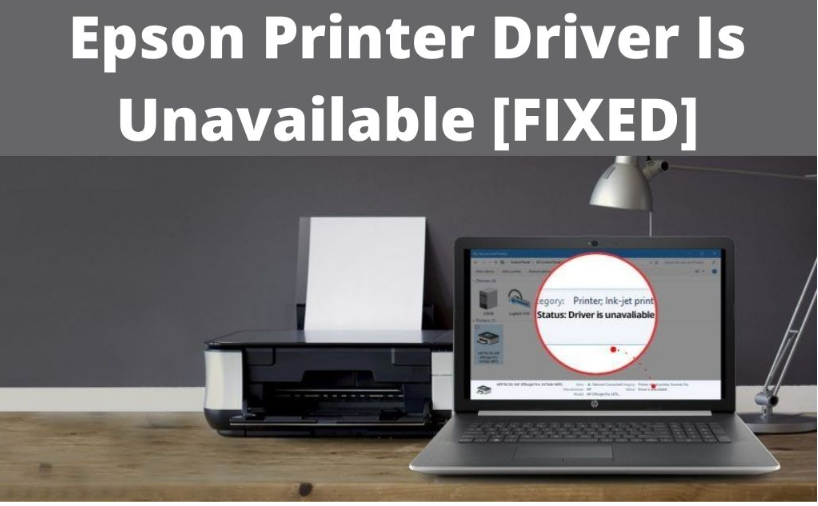
Recently, several Epson printer users have been reported that they get stuck with an error notification whenever they are about to print a file or document. The error notification states that “Epson printer driver unavailable windows 10”.
This error notification clearly defines that the installed driver is either outdated or not compatible with the Operating System.
If you are recently encountering this similar situation, then you can follow the undermentioned section in order to resolve the glitch on your own.
Fix Epson Printer Driver is Unavailable with 3 Effective Hacks
Here are the reliable hacks that can be followed in order to resolve the problem associated with the Epson printer driver. So, without further ado, directly proceed with the troubleshooting section.
Method 1: Install the Pending Windows Updates
One of the fundamental reasons why you might be encountering Epson printer driver error can be that the system is outdated. In such situations, it is recommended you install all the pending Windows updates to resolve the issue.
- Initially, click on the “Start” icon, locate and select the option titled “Check for Updates”.
- As soon as you perform this instruction, Windows will search for the available updates.
- Here, if you notice that the updates are available, then you need to choose the “Install Update” button from the appeared menu.
- From the confirmation pop-up window, hit the “OK” button twice.
Wait unless the installation process gets completed. Once done, reboot your device to allow the new changes to take effect.
Method 2: Update the Printer Driver
Using an outdated version of the printer driver can be another potential factor that might be responsible for the “Epson printer driver is unavailable”. But, it can be easily resolved by updating the printer driver to its latest version.
A majority of the users claimed that after updating the printer driver, the Epson printer driver error was resolved. Therefore, follow the instructions that are mentioned below:
- Go to the Search box on the taskbar and write “Device Manager”.
- Once you perform this instruction, a list will appear on the screen.
- From the result-oriented list, choose the “Device Manager” to initiate the window.
- After you access the Device Manager, expand the category to locate the drivers.
- Proceed to right tap on the Printer Driver and hit the option named “Search automatically for updated driver software”.
- From the appeared menu, choose the option titled “Update Driver” and stick to the on-screen instructions to confirm the action.
After the installation process is over, you can reboot the device to apply the new changes.
Method 3: Reinstall the Printer Driver
Even after updating the printer driver, if the “Epson printer driver is unavailable” error message pops up on the screen, then reinstalling the printer driver can be the best option for you.
Follow the steps mentioned below:
Step 1:
Press the Windows logo key along with the R key in order to initiate the Run window. On the Run dialogue box, write “Control” and hit the Enter button to execute the command.
Step 2:
From the appeared menu, choose the “Control Panel” to invoke the window. After accessing the Control Panel, make an attempt to locate the “Programs and Features” menu.
Step 3:
After locating this menu, proceed to click on it. Under the “Programs and Features” section, try to find the Printer Driver.
Step 4:
On the next screen, proceed to right tap on the Printer Driver and hit the ‘Uninstall” button. Confirm your action by choosing the “OK” button.
Step 5:
After removing the printer driver, reboot the device. Once the device boots up, the printer driver will automatically get installed on the device.
On the other hand, you can also visit the official website of Epson and look for the latest printer driver. Now, you can follow the instructions to download and install the printer driver for your Epson printer.
We hope, after performing the above methods, you will be able to resolve the problem associated with the Epson printer driver on your own.
How to Reset Epson Printer to Factory Settings?
If you are using the Epson printer for your work and it is showing you an alert message like ‘maintenance required to the printer” although it is working smoothly. In such a situation you need to reset your system. In this blog, I will share some easy methods to How to Reset Epson Printer to Factory Settings with you.
Before we jump to the methods to reset the setting lets discuss some features of the Epson printer which have made it the most recommendable printer in the world.
Methodology To Reset Epson Printer To Factory Settings-
In this section of the blog, we will discuss some of the easy techniques which will help you to reset factory settings of Epson Printer.
Method 1:- With The Help Of Control Panel
To factory reset Epson printer with the help of this method, you just need to follow the instructions given below:
Step 1) Press the home button available on your printer then go to its setup. After this click on the home menu from that setup.
Step 2) With the help of navigation buttons (left and right button) try to run the setup menu. Then hit the ok button.
Step 3) Now again use that navigation button and search for the ‘default restore setting” option. Once you find it then press enter on the ‘ok’ button.
Step 4) Time to use the top-down navigation button to look for the ‘network restore’ settings. After you find it click on the ‘OK’ button.
Step 5) Turn off your printer and restart it again.
Hence, you have successfully factory reset the printer’s settings.
Method 2:- With The Help Of Reset Button on Epson Printer
All the models of the printer have a factory reset option button at the back of the printer’s body. Following are the step by step procedure to reset Epson printer to factory settings.
Step 1) With the help of the power button turn OFF your printer.
Step 2) Press the Reset button present at the back of your printer. You can do this using any pointed pin.
Step 3) Turn ON your printer. Make sure you press the reset button of the printer for at least 5 seconds more.
Step 4) Once you get the print out of the warning page then release your hand from the reset button. After that within a few seconds, you will get one more print out which e]will consist of the default IP address.
Step 5) Use that printed IP address to reconfigure the computer with the printer.
This method takes less time, less than a minute to factory reset the printer and is also used very often.
Method 3:- With The Epson Adjustment Program
This method is useful in situations when the printer button is not working. To reset the printer with the help of this method you need to be patient. The steps to be followed to Reset Epson Printer to Factory Settings are given below.
Step 1) Download the latest version of the Epson Adjustment Program of the Epson printer. After that install it in your system.
Step 2) Open that downloaded Program.
Step 3) Hit on the select button to make all necessary selections.
Step 4) Now choose the modal and port number of the printer that is to be connected to the computer.
Step 5) Hit enter on the ok button.
Step 6) The window with the Adjustment and Maintenance option will appear on the screen. Choose the waste ink pad for the maintenance section.
Step 7) Press enter on the ‘ok’ button.
Step 8) Navigate to the bottom right corner and select the initialize button.
Step 9) Hit on the finish button.
Step 10) Restart your printer.
Hence, the factory reset is done successfully.


Check Out the Detailed Procedure to Reset Epson WF 2750 PrinterEpson is a company that is popular for offering the best printing devices with incredible features.
Despite that, there are times when the user might face a technical glitch with the device.
So, in such situations, the user is suggested to set their printer to default to resolve the printing issues.And for users wondering how to printing issues with Epson WF 2750 printer can go through the printer reset settings shared in this article and resolve common problems with their printer.Quick Steps to Reset Epson WF 2750 Printer:For the users looking for the detailed steps on resetting Epson WF 2750 printer settings, they can go through the steps shared below carefully and fix the printing issues they are facing with the device.To reset the Epson printers to default, the user initially needs to press the Home button.Now, the user can press the arrow buttons to open the Settings section.Then, the user can select the restore to default settings option and click on OK.After that, the user can choose an option as per their preference to reset all settings or network settings.And then, the user can click on the OK button to save the changes.Now, the user can check if the printer issues persist or not.Thus, this is the detailed procedure on how to reset Epson printer.
Still, if the user fails to reset the printer settings, they can contact the technician person and seek details regarding the procedure or other issues they are facing during the reset process.
So, for those facing problems with Epson WF 2750 printer, they can use the information shared.


