


Ideas that will help you create photos with a transparent background
Simple yet powerful editor
Many effects to choose from
Detailed lessons provided by the official channel
Want to explore your graphic creativity with images with a transparent background? Stay tuned for the most popular ideas to get unlimited likes on your social media!

Image by hubpng
Part 1 What are PNG images with a transparent background?
Images with a transparent background are essentially blurred overlays of any graphic content, such as a photo or video, which are useful for emphasizing the main element of the content. Compatible with a wide variety of image and video formats, it is one of the most popular right now, as it is an excellent tool for content promotion. These are the latest examples of creative information presentation, along with being one of the best branding techniques that can make your content fresh and unique.
Using a transparent background as a branding tool helps show key highlights of your product with a supporting background image, such as a brand logo. This helps your audience get a general idea of your brand. Apart from this, you can also ensure the authenticity and quality of your branding by using a watermark in the background image.
Images with a transparent background are currently a popular promotional method, due to their appropriate compatibility with any web design and the flexibility to mix with the most diverse color palettes and different elements on a product web page. It can also be easily converted into a 3D image to provide realistic product visuals.
Part 2 Differences between PNG, JPG, and GIF
Diversity in requirements and usage has led to a wide variety of image formats, each suited to a specific purpose. Because of this difference, it becomes difficult to determine the best image format that will be able to prepare the least expensive images while adhering to the exact user needs.
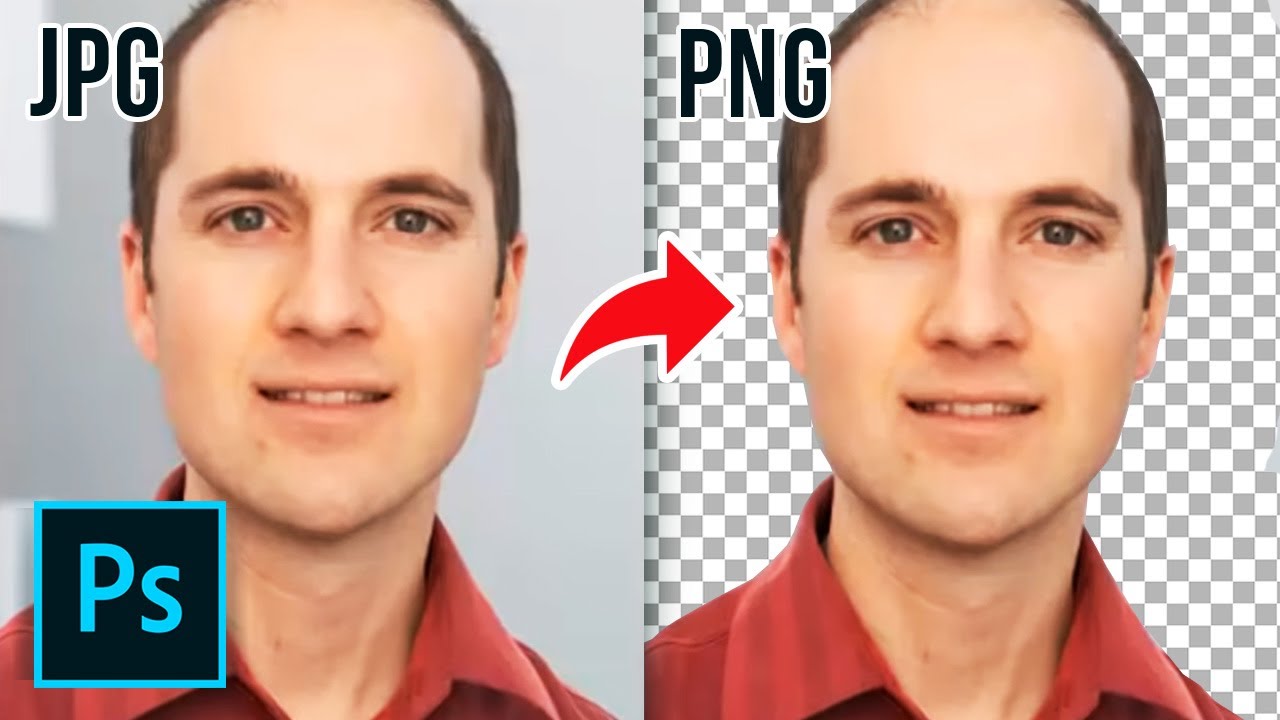
The JPG image format is recommended for natural still images that have smooth changes in intensity and color. If your content requires a transparent background for images, or contains text and elements with a sharp image contrast, such as a brand logo, it is best to use the PNG format for images, and do not forget that the GIF format is best suited for presenting animated content. As an explanation of the above usage limitations, here's a comparison of popular PNG, JPG, and GIF image formats under some popular criteria.
01 pressure
Image compression makes it easy to transfer data quickly across different web platforms, due to its small file size. While a file can be losslessly compressed, choose an image format that preserves image quality to match your data needs. Lossless compression is guaranteed to recover the original image, but lossy compression fails to do so.
JPG
The JPG format is a lossy compression method that depends on your ability to receive the data. The format has a lossy compression ratio of 1:10, without affecting the original image quality. However, increasing the compression ratio may cause noticeable differences in image quality.
JPG compression uses the concept of a fully discrete Cosine transformation, that is, it takes the average color of an image pixel close. Therefore, it is appropriate to use this format for natural calm images and landscapes, with a smooth transition of color and intensity. However, it is not recommended to prefer this image format for transmitting high-contrast and high-definition images.
PNG
This format supports shrink compression technology and has no defects and does not reduce image quality. Choose PNG image format for higher quality compression as compared to JPG. This format is more effective with higher quality images, clearer image display and takes up more memory space on your device.
You can rely on PNG images to present data with high-contrast pixelated text, shapes, and logos. However, it is not a good choice for transferring high-resolution digital photos.
GIF
Working on the LZW compression algorithm, this image format was originally used to display simple website graphics when the PNG format was still in its development stage. However, with the advancement of PNG as a more efficient compression format, the use of GIF is now limited to sharing animated image content.
02 Transparency
Transparency is used to describe the invisible content in an image. It is suitable for use in photo backgrounds when you want to put more emphasis on the main content, such as your logo, cohesive text for your brand, etc. The transparent background used here makes it easy to use a particular image over other backgrounds and images of different colors.
JPG
The JPG format has limitations that prevent it from being compatible with transparent images, and is therefore not suitable for applying and saving images with a transparent background.
PNG
The PNG format gives you the freedom to use image transparency in two selective ways. You can either choose to make your image partially transparent by using the alpha channel to seamlessly blend the edge and background, or use the transparency selection bar to make pixels of any given color transparent. The PNG8 and PNG24 versions support transparency for the alpha channel and cursor, respectively.
GIF
By its nature, this format supports cursor selection of transparency and sets a specific background color as transparent. Due to the absence of alpha channel transparency, there is an unsatisfactory blending of edges on the background of the image. The unevenness becomes more noticeable in the case of images that have detail and images that are very round.
While this loss can be mitigated somewhat by using image stabilization, GIF is still not the best choice for creating images with transparent backgrounds. PNG is more reliable in this respect.
03 colour
Color is an obvious strong theoretical component for identifying the differences between JPG, PNG, and GIF image formats, as each of these formats supports a specific number of colors on an image.
JPG
The color of JPG images is a huge stock of 16 million colours, which makes it suitable for storing landscape shots as it provides smooth color transition.
PNG
The two PNG versions differ in color contrast. PNG8 supports 256 colors, and PNG24 supports 16 million colors, similar to JPG. Consider using PNG8 for images with simpler shapes and fewer color differences. On the other hand, PNG24 is best used for images with transparent backgrounds, high quality, and complex shapes with detailed edges.
GIF
The GIF format supports approximately 256 colors, one of which becomes transparent when using cursor transparency, and this format supports 255 different colors.
04 Animation
Panning here is not necessarily limited to frame rates, but refers to a certain periodic movement of certain image sections over time. Among JPG, PNG, and GIF, the GIF format is compatible. With Just Animation, you can use this utility to create and share eye-catching images and banners to use as advertising media. The emergence of content platforms for GIFs, such as GIPHY, Tumblr, etc., has taken the reach and use of GIFs to a higher level.
There are a variety of image formats to choose from to meet your specific content requirements. However, you can always choose the format according to your need.
Part 3 How to make an image's background transparent
After knowing enough about images with transparent background, you must be feeling interested and excited to try creating these images yourself. The software market offers some of the best tools for creating stunning image examples with transparent backgrounds. When looking for alternatives to How to make images with a transparent background , we are going to discuss below some of the best options:
01 Canvas
This is a first class image creation and editing tool, which you can use to add a little fun to your website design material, watermark or even showcase your image creation for fun and entertainment purposes. The tool provides a simple and fast way to create images with a transparent background.
This tool gives you the freedom to choose from different transparency levels, image layers, and effects to give your creation a perfect professional look. This tool also provides you with a transparent, clean and accurate background image that will catch the viewer's attention.
This graphic design tool is free to use if you want to limit yourself to creating images and playing with effects. However, if you want to experience the fun of creating transparent background images with this tool, you need to get a paid subscription.
How to make an image's background transparent using Canva
Here you can learn how to add images with a transparent background to still images using this tool:
Step 1: Create the account
To use this graphic tool for creating images, you must have an official account. Visit the official website of the tool, run it on your system, create a Canva account and log in.
Step 2: Choose a photo
Consider browsing through your device to choose an image to create artwork with a transparent background.
Step 3: Remove the background
Now you need to remove the background color of the selected image. In the welcome interface of the tool, go to Effects in the top toolbar and select Remove Background from the available options to remove the background layer and create a design with a transparent background.
Step 4: Save your photo
After removing the background of the image, upload it to your system. To do this, go to the "Download" icon in the upper right and click on it.
Step 5: Choose the file format
Here, you need to choose a PNG image format to get a transparent background image.
Step 6: Transparency
Now it's time to make your photo's background transparent. You can do this by clicking the Transparency checkbox below the File Format checkbox.
Step 7: Upload your creativity
When you're done setting the parameters above, hit the "Upload" tab to import your artwork to your device's gallery.
02Photoshop
This software is an excellent image editor and graphic design tool that allows you to add variety and elegance to your brand images. You can tweak a variety of presentation features to enhance your images and make them express the content you have in mind.
Using Photoshop allows you to display your content against a dynamic colored background, which is why it's best to pick out the interaction in the background to make the viewer feel calm. Photoshop can make logos with a transparent background for products on your site, suitable for placement anywhere on web pages, regardless of the site's background color.
How to make an image's background transparent in Photoshop
See the next section of this article for a tutorial for creating an image with a transparent background in Photoshop:
Step 1: Download Adobe Photoshop
Go to the official Adobe website and download the Photoshop application to your device. Install and launch the app to get to the welcome interface of the app.
Step 2: Create an image project with layers
In the main interface, open the image you like and go to the "Layers Panel" on the right of the image window. But, if the Layers Panel does not appear by default, access the top toolbar and hit the Window tab. From the dropdown menu, select Layers.
In this panel, double-click on "Background". This will bring up the Rename Layer dialog box. You can either enter an appropriate name or continue with the default layer name. When finished, click OK.
Step 3: Let's get creative!
In the application interface, go to the toolbar on the left and select the Magic Wand tool. Again, access the Options bar at the top and choose Select Body. This will make it easier to select precise objects in the image, regardless of the background, and the selection will be visible as a "moving line" around the object.
If you find that the selection is not suitable, use the "magic wand" to remove the excess background parts by selecting the "Remove from selection" option, or even add some additional product parts that suit your requirements. As you select, be sure to include any areas you want to hollow out within the body.
Step 4: Remove the background
When you're left with just the product selected, go to the top toolbar and hit the "Select" tab and choose "Invert Selection" from the next drop-down menu. Alternatively, you can use "Shift + Ctrl + I" on Windows, or enter "Shift + Command + I" on Mac.
Reverse the selection you made and click the "Back" or "Delete" button on Windows and Mac computers, respectively. This will make the background of your image transparent. In Photoshop, a panel of gray and white squares is the transparent background.
If you want to deselect something, press "Ctrl + D" on Windows or "Command + D" on a Mac.
Step 5: Save what you created in a web-friendly format
Step 5: Save the file you created in a web-friendly format
Speaking of preferred image format, PNG24 is highly recommended, due to its flexibility in alpha channel transparency, which allows partially transparent image backgrounds along with layer transparency. This, in turn, makes the process of merging the image with different colored backgrounds on different websites and platforms without faded pixels possible.
To save your artwork in the PNG24 file format, go to the application's toolbar, hit the "File" tab, and choose "Export" from the drop-down menu that appears. Select the Export As option from the Export pop-up menu.
For an older version of Photoshop, click the Export tab, choose Save for Web from the drop-down menu, and then select the PNG24 option. A formatting dialog will appear where you can adjust the transparency settings. To do this, go to File Settings on the right, choose the PNG file format and select the Transparency option. Avoid selecting the "Smaller size" option, otherwise the image will be saved in PNG8 format.
The image file size is displayed on the left of the screen. Save the image in a reasonable file size, preferably not exceeding 200 KB, to avoid slow uploading of images to platforms. You can adjust this under the "Image Size" option on the right.
Choose appropriately low dimensions, being careful not to select a size that is too small, or the end result will be blurry when you share it. It is preferable to set an image size 50-100% larger in order to display properly on different devices.
Step 6: Final Save
Once you are done with all the image settings, click "Export All" to save your work to your computer. In the Save File dialog box, choose the location you prefer to save the image, enter a suitable name for the file and choose the .png format, and finally click Save.
03 Filmora
Developed by Wondershare, it is an excellent photo editor and photo creation software that you can rely on to create stunning works of art in a variety of file formats. Speaking of background transparency in particular, the software comes with a unique "green screen" feature to create high-quality, transparent background images within a few clicks. You can also give your creations a professional touch with many classic photo and video editing effects that are perfect for making your designs stand out on crowded websites.
How to make Filmora background transparent
A step-by-step tutorial on how to create an image with a transparent background using Filmora is discussed below:
Step 1: Download the software
Visit the official website to download and install it on any of your Windows or Mac devices.
Step 2: Import media files
Launch the application to get to the main interface, where you will find the Import tab. Click on it and choose "Import Media File" from the next drop-down menu. This will upload your selected image to the program's media library.
Step 2: Draw on the timeline
Now you need to insert the image you want from Filmora's media library into the program's timeline. You can do this either by right-clicking on the selected image and then selecting the "Insert" option, or by using the simple "drag and drop" method.
Step 3: Adjust the transparency
In the editor's timeline, double-click the selected image to open the Settings tab. Scroll down in the Options tab to locate Chroma Key Settings. Press the play button to activate the "Chroma Key" options and you will see that the image has become transparent with the default background color "green".
Alternatively, you can go to the "Select color" option, choose the "color picker" to the right of it, get to the section of the image you wish to make transparent and click once.
In case you get a partially transparent background, you can make further adjustments in the "Chroma Key" settings, such as contrast, edge thickness, offset, edge smoothing, etc., to make sure the background is fully transparent. When you are satisfied with your work, click OK.
Step 4: Export the media
Now you can try adding the transparent image to any video or exporting it to any media platform. To do this, click on the "Export" tab in the upper right corner of the editor's timeline.
Part 4 How to convert JPG images into transparent PNG images
Given the various information sharing and content specification requirements, you may need to switch between different file formats at a number of moments. One example of this is converting images from JPG format to transparent images in PNG format. When looking for suitable alternatives to put the problem right, there are many software options on the market.
We have discussed the best solutions to convert images from JPG to transparent images in PNG format that you can choose to convert JPG images with colored background to PNG images with transparent background, considering how to save images in PNG format with transparent background :
Filmora's JPG to PNG converter
Filmora is the top-rated graphic design software highly preferred by users that fulfills all the needs of designing and converting video and images in the most convenient manner. Developed by Wondershare, it is the best choice for all graphics editing operations. While the program is packed with comprehensive features to provide a highly professional elegance and to create stunning images, the transparent backgrounds implemented by Filmora are simply fantastic.
If you are tired of plain and boring images, try creating transparent background images with this software, which promises great results with the following features:
● Filmora comes with a unique "green screen" feature which is known to create transparent background images in moments of time shorter than the blink of an eye. You just need to upload the image to the program's timeline and adjust some color settings, and that's it!
● Apart from this, you can play with a variety of results and photo filters, such as graphic and text overlays, captions, and plenty of visual and audio effects to create an absolute masterpiece.
● Moreover, the program is free to use and welcomes you with a clear, cohesive and responsive user interface, guiding you through every important design step.
● Conclusion →
● Transparent backgrounds are now very popular for branding content and other media to promote a product. While there are a variety of specific image file formats, PNG is best suited for creating images with a transparent background .
● There is a wide range of options in the market for graphics and image editing tools, and Wondershare Filmora happens to be an outstanding program in the market for creating and converting images with transparent backgrounds.


When you are developing a website or a page related to eCommerce you need some images to use on this page.
we are sharing some Ecommerce related Vector images that you use on your page and make it more attractive.
These 5 images you can use in your webpage.
You need to know more about eCommerce development click here: eCommerce development company India


If the clipping path service companies' clients pictures or photos get a replicate with somebody she or he is not satisfied with his own organization as well as additionally this may be a factor for losing financial investment or money.So Photo modifying solution firms' site visitors might ponder anything negative with someone as well as a person's product.
They might take into consideration that a person is buying from the blandished site as well as vending for a higher rate from the marketplace.And also they additionally may be concerned that a person is vending copy items.
So they will buy from other sites as well as might never ever show up back to someone's site.
If any individual is fretting to develop someone's image unusually and capturing to everybody and more captivating someone must practice clipping course in color dice graphics.There are lots of clipping path solutions.
That would certainly best for every person.
The leading image editing and enhancing and retouching supplying firms are staying spread everywhere all over the globe.This firm has an expert who is professionals in everything to their efficiency.


