


Table Of Content
- Step 1: Connect the Canon PIXMA Wireless Printer to Wi-Fi
- Step 2: Download the Canon PIXMA Printer Driver on Your Device
- Step 3: Complete the Canon PIXMA Wireless Printer Setup
Other Section

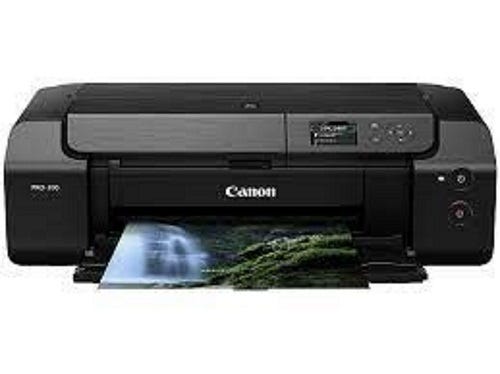
Canon PIXMA is among the most sought-after printing devices by consumers. These printers are worthwhile to use whether you want them for personal use or office use. Its advanced & smart technology and incredible features make the printing jobs seamless with best-in-class results. However, if you are buying this machine, you must know the printer setup. Though there is no issue if you do not know anything about that yet cause we are here for you. So, let’s start learning the stepwise process of Canon PIXMA wireless printer setup.
Step 1: Connect the Canon PIXMA Wireless Printer to Wi-Fi
First, you have to connect the printer to Wi-Fi if you want to complete the Canon PIXMA printer wireless setup.
- Go to your Canon printer and press the Setup button.
- Then utilize the arrow buttons to select the Wi-Fi Setup option.
- After that, click on the OK option.
- Next, choose the OK option after selecting Manual Connect.
- Now, you have to choose the option of OK.
- In the next step, you have to type the password for your network connection.
- Lastly, the connected message will appear on the screen.
If you encounter any printer issues while connecting your Canon printer, then reach out to our printer experts for a free consultation via phone call or live chat from the Support page on our website.
Step 2: Download the Canon PIXMA Printer Driver on Your Device
You need to download the driver on your device for the Canon PIXMA wireless printer setup. Windows and Mac devices require a compatible driver, and the process is also the same for both operating systems. Here is the procedure you can use to get the drivers.
- Start with accessing the Canon support page on the web browser of your computer.
- On the website, enter the full name or model number of the printer you have.
- Now, the option for your Canon printer will show up on the screen; click on it to jump to its support page.
- On the support page, select Software & Drivers option.
- Moreover, a various list of printer options will open up on the display; pick the suitable driver you want to download for your device. (Get the Recommended driver if you are downloading the driver for a new machine.)
- Once you click on the Download option next to the driver option, it will initiate the downloading process.
- When the Canon printer driver is complete on your PC, open the setup file.
- After that, follow the steps on the setup wizard to complete the drive installation.
You can download the Canon PRINT Inkjet/SELPHY app to set up the machine and print with it on your mobile phone devices.
Step 3: Complete the Canon PIXMA Wireless Printer Setup
Once you have completed the driver download, you can do the Canon PIXMA printer wireless setup.
- First of all, move to your computer and go to the Devices and Printers option. You can get that by going to the Control Panel window.
- Next, you will see the Add Device option in the Devices and Printers field.
- Afterward, the PC will start scanning for the Canon printer you are trying to connect.
- Once you see the printer option, click on it.
- Lastly, the printer Canon PIXMA wireless printer setup will be complete, and the printer will be ready to do its job.
Note: If you need any printer-related assistance, you can connect with professionals via live chat or call from the Support page on
our setupwirelessprinter.com website.
Frequently Asked Questions
Question
How to set up a Canon PIXMA mx492 wireless printer?
In order to set up the Canon PIXMA MX 492 wireless printer, follow the below steps.
- First, you have to connect your printer to the network connection you are using.
- After that, move to the official website of Canon support.
- Next, search for the driver for your Canon PIXMA MX492 printer and download it.
- Once the download is complete, open the driver file and install it.
- Now, from the Devices and Printers window on your PC, select the printer.
- Finally, the printer setup process will be complete.
Question
How to set up a Canon PIXMA mg2922 wireless printer?
If you want to set up a Canon PIXMA MG2922 wireless printer, then follow the below guide.
- For the first step, complete the connection of the printer and Wi-Fi connection.
- Next, you have to download the suitable driver from the official website.
- After the driver downloads, install it by following the on-display procedure.
- Once the installation is complete, connect the printer to the computer from the Devices and Printers window.
- Lastly, the printer will be ready to use.
Question
How to connect a Canon PIXMA printer to Wi-Fi?
Here is the process to connect a Canon PIXMA printer to Wi-Fi.
- First, move to the Control Panel of your printer and select Setup.
- With the help of the arrow button, choose Wi-Fi Setup.
- After that, select OK.
- For the connection option, choose Manual Connect.
- Next, enter the password for your network connection.
- Now, the Canon printer will be connected to the wireless network.
Visit :- https://setupwirelessprinter.com/canon/canon-pixma-wireless-printer-setup-step-by-step-guide


To execute features like faxing, scanning, printing & copying use the Canon MX490 printer.
Supports both wired and wireless connections.
After buying a new Canon MX490 printer, unbox and set it up.
Guidance on how to execute the Canon Pixma MX490 Setup is given on this section.canon.com/ijsetup"}" data-sheets-userformat="{"2":4224,"10":2,"15":"Arial"}">Visit site:https://canoncomsijsetup.com/canon-mx490-setup/

Canon Printers are one of the printers that have earned their reputation in the technological market.
The printer has shown efficient potential to stand in the competition as compared to other printers due to its performance and efficiency.
To Setup Canon Pixma Wireless Printer is so easy but still, there are some users who find it difficult to install printer drivers inside the Mac or Windows operating system.
But the users of Canon Printer don’t need to worry as we have a certified team of technicians that will not only resolve these issues but will also ensure that these technical issues will not occur in the future.
So One of our technicians has suggested some troubleshooting steps on How to Setup Canon Printer on Mac operating system below.


Get Canon help from canon ij setup and set up Canon printer.
Learn the complete Canon ij setup download and installation process here.
Know more about Canon PIXMA, imagePROGRAF, MAXIFY, CanoScan, and others.
Visit : ij.start canon , ij.start.canon


