


From the dark mode to stopping the unknown callers, iPadOS and iOS have upgraded themselves so much. Apple recently released a new beauty name iPhone SE which is an upgraded version from previous iPhone SE. New thing about the New SE is that by default, it works on iOS 13.4. In the new iOS and iPadOS, sharing of the iCloud folder and compatibility of the trackpad is now enabled.
Read More - https://2020-nortonsetup.uk.com/find-the-latest-features-of-ios-13-4-on-new-iphone-se/


The latest edition of iOS provides various features and facilitated in iOS 13.4.
The new updated edition of this iOS brings a number of interesting features such as trackpad support, folder sharing tools that boots your device for a dynamic one.Follow these points to know different facets of your iPhone’s latest OS 13.4.Trackpad Support: This new feature removes the keyboard to an extra advanced technology, especially for iPad.
It looks like a laptop, and the entire mechanism works very smoothly on the device.New Dark Mode: Dark Mode provides an interesting feature that gives a soothing experience while working at night.
Anyone will be sent voice mail, and you won’t be frustrated by annoying calls or rings.Bluetooth Selection, Smarter Wi-FiiOS 13 provides you another comfort of enabling W-Fi and Bluetooth just from the device’s Control Center.
It saves your time and energy in launching the Setting application instead.This feature enables the users to connect to the existing and available connections in a simple tap on the Control Center.Using Swipey KeyboardJust like android devices, Apple provides the swipe typing in its updated edition of its Operating System (13.4.)
Here, the tool also provides various suggestions in this regard.This Swipey typing is also comfortable if you type with one hand, and you will get it once you install iOS 13.Dark ModeThis great feature is available across the basic application in iOS 13 that includes music, photo, and calendar applications.There is the various OS in Android that supports Dark mode very compatibly.

Just like other brands, Apple doesn’t provide any straightforward process to delete multiple contacts at once.
Still, if you are searching for an efficient procedure to remove certain contacts from the contacts list, then this blog is for you.
Here is how you can delete multiple contacts at once on your iOS device.Procedure to Delete Multiple Contacts at the Same Time using iCloudiCloud is the best cloud computing and data storage platform.
If you want to make changes to your contacts list, all the modifications will automatically reflect your synced devices.
To do so, you need to use the web edition of iCloud on your Mac.Follow these instructions to delete several contacts at a time via iCloud:At the start, visit the web page of iCloud via the link that is iCloud.com.Then, sign in to the account via Apple ID and Passcode.After that, choose the Contacts option by navigating the iCloud main page.Next, select and highlight the contact you desire to remove by tapping the Control key on the Mac.Now, scroll down the page and then choose other contacts to remove.Hit the gear-shaped icon from the lower left of your screen.Then, hit the Delete tab.If it asks for confirmation, press the Delete tab again.The selected contacts have been successfully deleted from all the synced devices.
In case you find the solution is slightly complicated for you, try a third-party iOS app to delete your desired contacts in one go.Procedure to Delete Multiple Contacts via GroupsYou can easily use the third party app “Groups” that provides advanced features via in-app purchases.Here is how to delete contacts with the Groups app:First of all, you have to download the Groups app directly on your smartphone.Then, open the app.Allow the app to access all your contacts when it asks to do so via prompt box.Choose the option “All Contacts” from the provided listing.Go through the contacts listing and then mark the contacts you desire to remove by hitting the circled-shaped icon located towards their name’s left-hand side.Hit the option “Choose Action” from the uppermost section.Then, press the option “Delete Contacts…” on the prompt box.Now, hit the “Remove from my iPhone!” option to verify your decision.Congrats!

If you said yes, then it means your device has some issues, but it doesn’t mean you cannot fix it.
Do not be anxious as there are still some ways that you can try to troubleshoot the ongoing issue.
This article has some practical resolutions to fix an iPhone that freezes on the Apple logo during the startup.So without wasting any more time, let’s get started.Reasons for Your iPhone Freezing on the Apple LogoWhen there are some common or critical glitches in your device’s operating system or firmware, it might cause your device to stick on the boot screen.
It can be pretty puzzling for a regular user to find the exact cause of this problem.
Here are the common reasons for the Apple logo to stick on your iPhone screen:Glitches in the newer iOS updateA malfunction during the jail-breaking processInstalling a Beta iOS on your iPhoneSharing data between an older iPhone to a new iPhoneMalfunction in the hardware or componentsTroubleshooting an iPhone That is Stuck on the Apple LogoIf you have noted your iPhone freezing on the boot screen for more than 20 or 30 minutes without any changes, you should try these three effective fixes:Fix 1: Rebooting Your DeviceMost users who have encountered this problem have fixed it by simply restarting their phones.
All you need to do is try a simple restart and see if that fixes the problem.
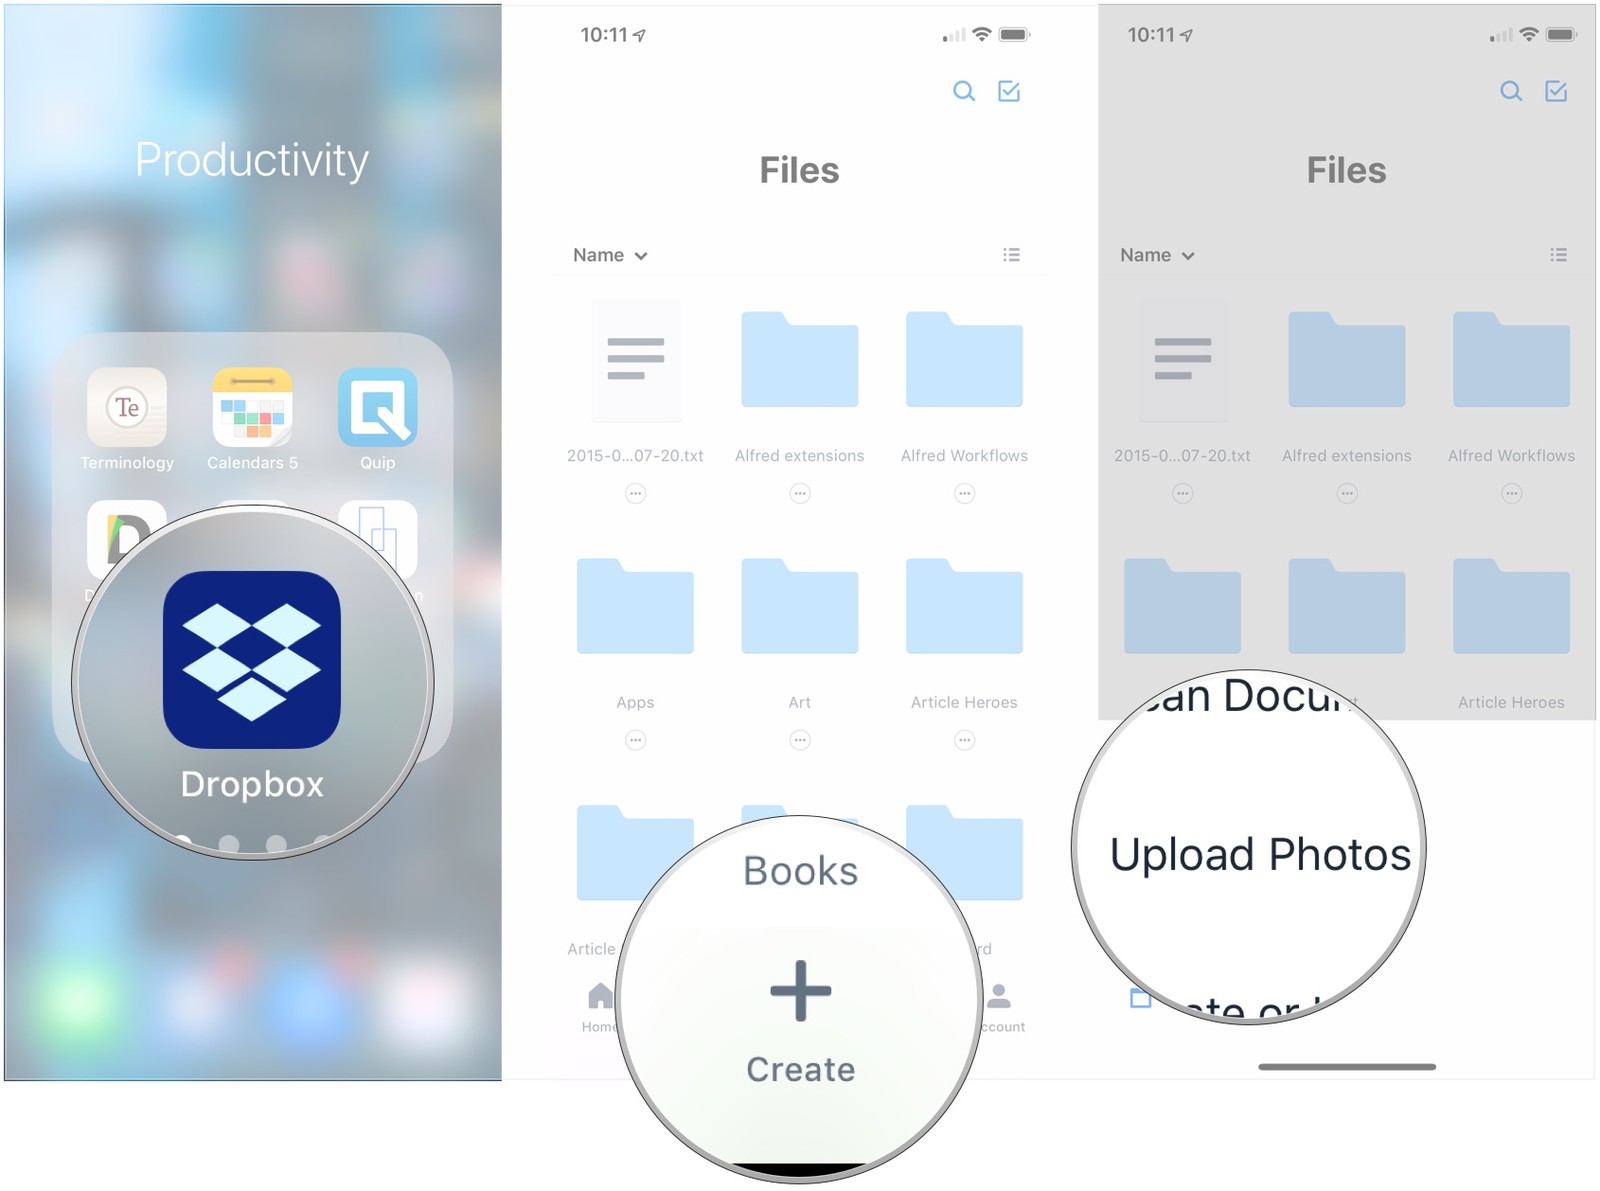
Dropbox app is a software that stores all kinds of files, documents and images to save some space on your device.
It keeps your data safe and asks for a password every time you want to reach your files.
It has four-tier yearly plans with free-trials.
The plus plan provides 2TB space, security, anytime-anywhere access to the files, and costs $9.99/month if billed yearly.
The professional plan offers 3TB space, secure sharing, two-factor authentications, etc.
The advanced plan provides phone support during work hours and gives you an upper hand to audit logs with file event tracking, and it charges $20/user/month if billed yearly.

Text messages shared from phones are usually very private.
So for hiding your personal information on your iPhone, you need to go through the given below steps carefully.Source : http://2norton.com/best-ways-to-hide-messages-on-iphone/The method of turning off the Lock Screen Message PreviewLuckily, it can be disabled from the Settings menu.Firstly, view the Settings application.Then, visit the Notifications.After that, press on Messages.Next, move downwards.Then, search the Include part.Note that the Include option is enabled by default.
Press on it for disabling it.Then, request an individual to send a message to you.After that, lock the iPhone.Lastly, check whether the messages preview feature has been turned off or not.The method of turning off Lock Screen NotificationFirstly, view the Settings application and view the Notifications.Next, press on Messages.Then, search for the Show on Lock Screen option.After that, click on Show on Lock Screen option for disabling it.The time you are on it, you might wish to turn off the Badge App symbol too.Note: Turning off the Badge Application symbol option deletes the small badge which displays the number of unread texts from the Message application symbol.The method of hiding texts inside the messages application using HiddenConvosFor jailbroken iPhone users: Go to Cydia and then install the HiddenConvos tweak.After installing the tweak, view Messages and pull left on any chat that you wish.
A new Hide option shall get displayed.
It shall be after to Delete option.Then, press on it.
It shall make the chat vanish without letting it get deleted.For making it display, you need to click on the Edit and, then press to Unhide All.More to readHow to Fix Images Not Loading Issue On FacebookHow to Download Instagram videos on your PCHow to Organize Your PDF FilesSome other apps for hiding messagesHaving a Jailbroken iPhone is not possible for each.
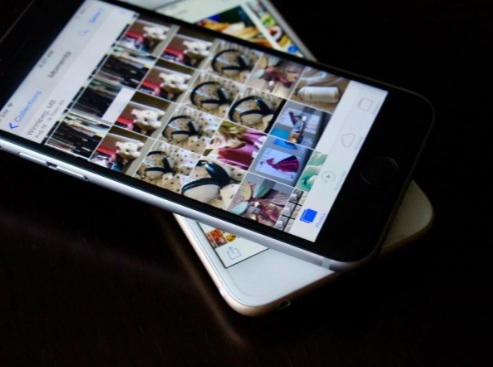
If you want to make your images and video well organized, then the Photos application will help you place them into smart groups which depend on the time and location.
Moments is the smaller group, Collections is the larger groups, and after that, Years is the largest group.
If you want to navigate photos on your iPhone and iPad, then follow the instructions mentioned below.Steps to Navigate Between Moments, Collections and Years Smart Groups• Open the Photos application.• You will get this app on the Home screen of the iPhone or iPad.• Press on the back option.• It is located on the upper left-hand side of the display.• Press on the photo or video thumbnail to navigate the photos to the small group.• Some of the iPhone applications allow you to go back by sliding from the left-hand side.• This is a gesture which is not available in the Photos app.Steps to Navigate Between Years, Months and Days in Your iOS 13• Open the Photos application.• It is given on the iPhone or iPad with iOS 13.• Press on the Photos option in case you have not open it yet.• Press on the timeline view option which you wish to get.• The timeline options are “Years, Months, Days and All Photos.”• In case you begin at Years, press on the year and it will change into the Months.• Pressing on the picture will change it into the All Photos view.• You can go back to the view by pressing on the Years, Months, or Days located in the textbox over the Photos options.Steps for Viewing Picture and Video Locations on Your Map• Open the Photos application.• It is located on the home screen of the iPhone and iPad.• Press on the location name given over the photos group.• Slide up for searching for the map.Steps for Viewing Picture and Video Locations on Your iOS 13• Open the Photos app on the iPhone or iPad with iOS 13.• Ensure that the Photos option is already opened on the screen.• On that window, you can change between Years, Months, Days, and All Photos.• In the Months or Days option, press on the three dots symbol.• You will get this symbol on the collection thumbnail.• Press on the Show Map option.Steps to Navigate Between Picture or Video in Years or Collections• Go to the Photos application.• You will get this on the home screen.• Keep pressing on the Year or Collection view display.• Press and swipe the finger on the backward direction and above the collection.• It will enlarge the thumbnail.• Click on the photo which you wish to see.• In case you have the pre-3D Touch iPhone Model, press on the picture.Davis Johnson is a self-professed security expert; she has been making the people aware of the security threats.
Her passion is to write about Cybersecurity, cryptography, malware, social engineering, internet and new media.
She writes for Norton security products at norton.com/setup.Source: http://norton-us.com/how-to-navigate-photos-on-your-iphone-and-ipad/