


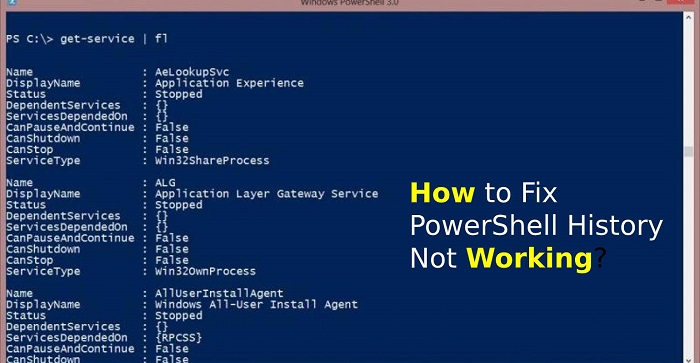
Even after the knowledge of the language, users may encounter some restrictions and bumps in the process.
One of the restrictions that users had reported is the shortcut of Ctrl+R is not working, which is the command to show the history or list of search.Source:-How to Fix PowerShell History Not Working?In this condition, users are not able to access the history section, which can be very helpful to users in many cases.
Powershell had created an extensive built-in list of commands used previously, which helps you to access the list of complex commands and saves you extra time to run the same and hectic command more than one time.When you can’t access the history section, then you can follow these steps to remedy the condition:Test the assembly of PSReadLineIt is not a significant problem for the users of PowerShell and it generated when users upgraded to Windows 10.
There is the possibility that you may remember the downloading the PSReadLine, even if you don’t, it comes to the Windows 10 package.It removes the traditional view of the feature of history and creates the new and more sophisticated display of the list of commands.
This function is not a built-in feature of the Windows Management Framework, so you have to depend on the third-party modules of PSReadLine.If you want to make sure that the installation has removed the problem, then you should run the command “Get-PSReadLineOption.” If you get the error referring to the PSReadLine, later, you should try to change the layout of the keyboard to en-US and check again for any improvement.Try Different Methods to Access the HistorySuppose you want to access history for some previous command, but you are unable to access history from the Ctrl+R command.Then it would be best if you tried different outlets to access history, and you can use the following cmdlet to do that:Get-HistoryGet-History | Select-String -Pattern “Search.”Get-History | Format-List -Property *Get-History | Export-Clixml -Path c:pscommands_hist.xmlIncrease Number Limit of Remember CommandAs a default, the buffer of the Command line only stores 50 commands.
You can increase the limit to save more command to store in your program memory.If you want to increase this limit, then you have to follow this process:Click the right button on the title bar of the window of PowerShell.Tap on the Properties in the list of options.Go to the Command History.Now you have to change the Value of Buffer size as per your requirements.

Learn Microsoft Windows PowerShell 5.x and become job ready in task automation and configuration management, PowerShell functions, script modules, working with output and coding in the Integrated Scripting Environment (ISE).
Students can clear PowerShell certification after completion of our PowerShell Course.
You will also get an exposure to industry based real-time use-cases in various business verticals.
Enroll & Get Certified Now!Course Features:30 hours of Instructor Led PowerShell TrainingLifetime Access to Recorded SessionsReal World use cases and ScenariosPractical ApproachExpert & Certified TrainersAbout Mindmajix:Mindmajix is one of the leading Online training provider with a decade of experience in the Online IT training Industry.
We trained thousands of students and even handled hundreds of corporates clients across the world.Mindmajix offers the best training in the industry with industry experts as trainers.
Some of our on demand courses include such as Big data, blockchain, Selenium, Python, Hadoop, and Artificial intelligence.

One such error is The Server Stumbled Error (code 0x80072F05).
So if you face this error, you should know about the solutions of this error and the user’s problems because of the generation of the error as well as it are essential to know the symptoms before treating any disease.This error can damage the cache of the Windows Store.The Server page will not be found.The Store will be unable to connect the server.There are chances that users will come across 80072ee7, 0x8000ffff error too.This error is generated when you want to access the Store, to resolve this error, you can follow these methods:Check the AntivirusIf you wish to keep your PC and its data safe from various malware and virus, you should use the antivirus programs.
There are chances that the setting of the antivirus program restricts you to access the internet, which causes the error message generation.If this is the reason, then you should go to antivirus setting and disable the settings that restrict the access of Network (or you can find them where you can add an exception and put the URL of Store).In some antivirus software such as Avast, users mentioned that they had enabled the Internet Sharing Mode under the setting of Firewall, to remedy the error.The best antivirus software is BullGuard, Panda, and Bitdefender.
(in these three you have to disable the Restriction of Network).Correct the Date and Time This solution is much simpler than others, it requires only you to check the date and time whether it is correct or not.If not then click on it and tap on the Change Date and Time Setting, then adjust them and the time zone.
It is much more accessible, so try this at starting.Erase the Cache of Windows StoreThis is a simple method where you have to work on one application, and the amount of work is also small.
For this, you should follow these steps:In the Store type WSReset.exe on the Search Bar, and right-click on it, and select Run as Administrator from the options.After for a while, you will see a message mentioning “The caches of the Store has cleared.” Now you should try to use the Store.Try to Re-register in the Store AppsGo to the search bar and search for Windows PowerShell.Right-click on the Windows PowerShell, choose the Run as Administration from the options.Once it opens type Get-AppXPackage | Foreach {Add-AppxPackage -DisableDevelopmentMode -Register “$($_.InstallLocation)AppXManifest.xml”} and hit Enter.
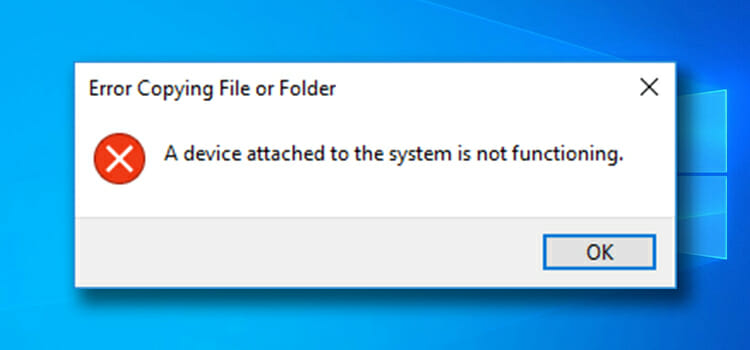
When you cannot communicate and move your date properly and get “A device attached to the system is not functioning” error due to some reasons like incorrectly connected, incompatible drivers, and many more.
If you wish to get rid of this annoying error, here are a couple of fixes mentioned belo.Modify the Transfer to PC or Mac Settings on iPhonesTo modify the transfer to PC or Mac settings on iPhones, pursue these on-screen step by step directions mentioned below:First and foremost, go to the Settings application on the iPhone device.Afterward, move down till you locate the ‘Phone’ settings and choose it.After going to the Photos settings section, move down until you get the “Transfer to Mac or PC Settings” option.You should choose the “Keep Originals” option and attempt transferring the files once again.Now, check to view whether the problem continues.Format the DeviceTo format the drive, pursue these on-screen step by step directions mentioned below:To invoke the File Explorer, use the Win and E hotkeys simultaneously on the keyboard.Thereafter, select the ‘This PC’ icon on the desktop or left side navigation panel.You will get the USB device connected.After that, right-click on it, then choose the ‘Format’ option.You will get a prompt screen consisting of all the settings.
In case you are not sure what to choose, leave it be and hit the Start button.Once you have done, attempt using the USB device and check whether the issue is fixed.Run DISM and SFC CommandsTo run DISM and SFC commands, pursue these on-screen step by step directions mentioned below:First, hold the Win and R hotkeys simultaneously on your keyboard.Thereafter, input “taskmgr” into it and press the Enter button to open the Task Manager.You should select the File option shown on the upper left side of the screen.Then click on the “Run new task” option via the list of the available options.Thereafter, input “Powershell” into the dialog section and tick the option beneath, which says “Create this task with administrative privileges.”After getting the Windows PowerShell screen, insert “sfc /scannow” into it and press the Enter key.
This method consumes some time as the whole Windows files are being scanned by the system and checked for damage phases.In case you face an error wherever Windows states that it gets some issue but is unable to solve them, you should input “DISM /Online /Cleanup-Image /restorehealth” into the PowerShell section.
It will download the damaged files via the Windows update servers and replace the damaged ones.
Don’t stop this process, because it can take some time according to the internet connection.Update the Device DriversTo update the device drivers, pursue these on-screen step by step directions mentioned below:At first, you have to press the Win and R keys combination on the keyboard to invoke the Run section.Thereafter, insert “devmgmt.msc” into the Run section and hit the OK button.Once you invoke the Device Manager screen, go via every hardware and right on your device, you are getting the issue and then choose the ‘Update driver’ option.Finally, Windows will prompt a dialog section asking you which way you wish to update the driver.
If you are in search of the best Exchange database recovery tool, I will introduce an amazing software where you can easily export EDB file to Outlook PST.
EdbMails Exchange Database Recovery tool.
This tool is efficient to repair corrupt EDB file and restore deleted or lost mailbox items from Exchange server database.Why you should choose EdbMails?EdbMails is an all-in-one, easy-to-use, highly scalable and professional recovery and migration tool available for a reduced cost.ExMerge utility is outdated and the PowerShell cmdlets may not give desired results.
Wherein EdbMails EDB to PST converter tool is the most advanced and simplified one.This is the major benefit of using EdbMails EDB to PST converter software, as the exported PST file can be imported to Office 365 and Live Exchange server easily.A large number of EDB Mailboxes migration may be a tough job.
EdbMails migrates any number of EDB mailboxes with ease.
It will also create mailboxes automatically on target Office 365 as well as the Live Exchange server.EdbMails Exchange EDB to PST Converter recovers the deleted mailboxes and its items which you think are lost permanently.EdbMails supports PST split based on the size of the PST during EDB to PST conversion operation.
If yes, then please read this entire post to get all the details.Method to Check the .Net Framework Version on Windows 10 ComputerAny Windows 10 user can easily get information about the .Net Framework version on their computer system.
If you want to check the current version, you need to follow the guide that we have mentioned here.
The method given here is much straightforward to follow and includes some simple steps.
Here, we will show you how to check the .Net Framework version using the PowerShell tool on your Windows 10 computer.
You can do so by going to the Start menu and then searching for “Windows Powershell.”From the results showing up on your screen, click on the PowerShell app icon to open it.And when the PowerShell window opens up on your screen, you will need to enter the following command: “Get-ChildItem ‘HKLM:\SOFTWARE\Microsoft\NET Framework Setup\NDP’ -Recurse | Get-ItemProperty -Name version -EA 0 | Where { $_.PSChildName -Match ‘^(?
!S)\p{L}’} | Select PSChildName, version.”After entering the command, hit the enter key.And now, the PowerShell window will display a list of the .Net Framework versions that are installed on your Windows 10 computer.
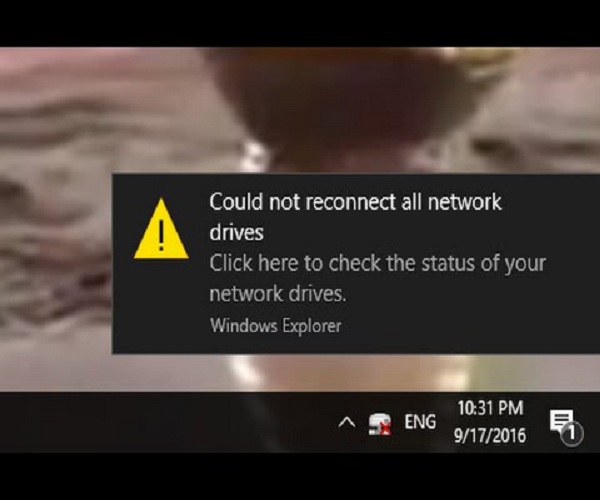
When you turn on your system, you may, all of a sudden, encounter the ‘Could not reconnect all network drives’ error due to various reasons.
At times, the mapped network drive may fail to reconnect in Windows 10.
So, if you are facing a similar issue, then here are some solutions given below.Create Windows Wait for NetworkYou should follow these steps given below:Press the Windows and R buttons to open the Run box.Thereafter, insert ‘gpedit.msc’ into it and hit the Enter key to launch the Local Group Policy Editor.Then make the way to the following location: Computer Configuration > Administrative Templates > System > Logon.Thereafter, reach the right side and locate the policy of ‘Always wait for the network at computer startup and logon.’You should double-click on it.Later, choose the ‘Enabled’ option and click on the Apply button then select the OK button.Now, restart the PC to apply the changes.Through the Task SchedulerYou should follow these steps given below:Firstly, make a folder of Scripts in the system and then paste the PowerShell script.Thereafter, launch the Task Scheduler.After opening the Task Scheduler, select the drop-down menu of Action and then select the option of Create Task.Once you reach the General section, add a name.Then select the option of ‘Change User or Group’, and choose a user or local group.Click on OK.You should mark the option of ‘Run with highest privileges.’Select the tab of Triggers and press the button of New.For the option of ‘Begin the task’, select the option of ‘At log on’ through the menu of the drop-down.Thereafter, click on the button of OK.You have to click on the tab of Actions and press the button of New once again.Choose the ‘Start a program’ option through the drop-down of ‘Action’ and input ‘Powershell.exe’ for the box of script/program.Input the following commands for the box of ‘Add arguments’: -windowsstyle hidden -command .\MapDrives.ps1 >> %TEMP%\StartupLog.txt 2>&1For ‘Start in’ section, you should enter the PowerShell script location: %SystemDrive%\Scripts\Later, click on OK to shut the screen of ‘New Action.’Now, move to the tab of Conditions.Beneath the Network section, don’t forget to mark the ‘Start only if the following network connection is available’ box.Finally, click on the option of Any connection and select the button of OK.Installing the Update of KB4469342You should follow these steps given below:Make the way to the catalog of Windows Update.After that, browse for the update of KB4469342 and download the update for the PC.Install the update.Now, restart the PC.By following the solutions mentioned above, you will be able to fix the network drives related error.Ava Williams is a self-professed security expert; he has been making the people aware of the security threats.
His passion is to write about Cybersecurity, cryptography, malware, social engineering, internet and new media.
He writes for Mcafee products at mcafee.com/activate.Source : Network Drives
Just getting to know the features isn’t good enough for evaluation.
Download Saketa’s 7 days free trial to experience it yourself and then go for a decision.SharePoint Migration Tool One-Stop Solution to Migrate to SharePoint from all the Latest PlatformsSaketa SharePoint Migration tool supports migration from all the popular platforms to the latest version of SharePoint, Microsoft Teams or other platforms to ensure the most efficient and hassle-free SharePoint migration experience.Saketa PowerShell ConsoleSharePoint Security ManagerPermission audit made easyScript and automateSharePoint Security ManagerPermission audit made easyDownload Now
PowerShell command is designed for Windows 10 that used to manage scripts and commands.
It can also use to change custom settings and do automatic tasks.
It is an extremely capable command-line interface that gives you an extensive tool and offers to get more control and flexibility on special scripting.The script can be considered the group of commands that are stored in a text format; this command only understands by the PowerShell that can perform multiple actions and separately.
PowerShell command has a quick power task that manages the Linux, Windows, and macOS operating system.
It can manage all your commands in your computers and access your data.
It can access registry, certificate as well as all the files storage in your system.Creating Script via NotepadLaunch Start.Find the NotepadTap on the first result to start the application.Paste your script or create a new script in the given text field.Tap on “”Choose “Save As.”Enter the File title like — the second script.ps2.Tap the Save icon.Creating a Script With the Integrated Scripting EnvironmentYou can also use PowerShell ISE to identify your scripts in Microsoft windows 10.
The article intends to explain the procedure of configuring Microsoft Outlook for a number of purposes like POP\IMAP in addition to.
Is actually usually still recommended that users follow the instructions accurately to complete the task without facing common Microsoft Outlook circumstances.For years the popular CRM vendors have claimed to do this.
And it takes more resources than every one of my company is willing pay out.At the very of your screen, particularly in the previous version of Microsoft Word, there several options of tool bar such as File, Edit, View, Insert, and some other options.
For printing, office 365 product key activation .
In the top left of in case you there is Microsoft logo, two arrows, and a floppy disk icon.With this added freedom, you will be able to stay in touch with your customers, business associates, and friends while you are on the get.
If you are connected with Exchange, you can se your meetings that are coming up as well.Formatting your text can certainly add glow and a personal art style to your design.
EDB files are the most important files in Exchange Server.
These are the root files that contain the data send by the receiver in Outlook.
When the PST file gets corrupt, then the two option available are EDB file or OST file.
EDB files are the first choice as they contain the updated data.
Getting data from EDB files in PST is secure and can be performed instantly with a single command.
So, users who do not know how to export EDB files to PST can follow the given stepsPrerequisitesBack up the EDB files and Exchange Server databaseAssign Administrative rights to perform the operationWhen the following conditions met then ensure thatThe new PST file is created on the network and the user knows the location of PST.The UNC path of PST file should be knownUsers must be able to acccess the PST file easily.Now run the following command to export/ import PST FileNew-MailboxExportRequest –Mailbox edbtoexport –FilePath \\PC-Name\ExportPSTFolder\importfile.pstReplace edbtoexport with the EDB file PST with the name of PST createdPC-Name with computer in which file is exported.In this way you can export the EDB files to PST.
Therefore, it is necessary for Exchange administrator to keep a disaster recovery method which help them to recover mailbox from EDB File Exchange 2010 / 2013 when any issue or threat occur.The primary method of disaster management strategy is to have a regular backup of entire Exchange data.
This process is an important one and most of the administrators find it annoying to execute it.To help you out, this article will guide you and provide solution to restore / recover the Exchange mailbox data from .edb file in a simplified manner.
Firstly, we have to investigate the situation where we have to perform this Exchange database mailbox recovery.Reason to Restore / Recover Mailbox from EDB File Exchange 2010 / 2013There can be multiple causes or reason due to which users have to restore the Exchange mailbox from EDB file and one such common reason is the deletion (intentionally or accidentally) of entire Exchange mailbox.
When any users deleted the Exchange mailbox by mistake & didn’t retrieve before the retention period expire, then they have to recover the Exchange database.There may be other case in which Exchange administrator has to recover the data from EDB mailbox and besides this one need to recover the mailbox database or Exchange database file from server when it becomes in accessible due to malicious virus attack, dismounted or offline database, hard disk failure, etc….Pre-Requisites:To restore or recover mailbox from EDB file Exchange 2010 / 2013 you have to require these things given below:1.
Then, create the recovery database via Exchange PowerShell cmdletNew-MailboxDatabase -Server mail01 -Name Recovery DB01 -Recovery -EdbFilePath “E:\EXDB12\Exchange Server\EXDB\File\EXDB.edb” -LogFolderPath “E:\EXDB\Exchange Server\EXDB\Logs”5.
Execute the Exchange PowerShell command:Get-MailboxStatistics Database RecoveryDB01 | ft -auto7.
Every operating system covers some basic built-in features, and Windows 10 is also included in this category.
Microsoft replaced the classic Control Panel program with the modern Settings app in its Windows 10 operating system.
But sometimes, there may be chances when you need to reset the settings app.
So, if you are also experiencing any of these situations, there is no need to worry at all.
The following article is about how you can reset the settings app on your Windows 10 computer.
Here, you will find the settings organized in categories that include Devices, Phone, Network and Internet, Personalization, Apps, Accounts, Time and Language, Gaming, and much more than that.
Learn Microsoft Windows PowerShell 5.x and become job ready in task automation and configuration management, PowerShell functions, script modules, working with output and coding in the Integrated Scripting Environment (ISE).
Students can clear PowerShell certification after completion of our PowerShell Course.
You will also get an exposure to industry based real-time use-cases in various business verticals.
Enroll & Get Certified Now!Course Features:30 hours of Instructor Led PowerShell TrainingLifetime Access to Recorded SessionsReal World use cases and ScenariosPractical ApproachExpert & Certified TrainersAbout Mindmajix:Mindmajix is one of the leading Online training provider with a decade of experience in the Online IT training Industry.
We trained thousands of students and even handled hundreds of corporates clients across the world.Mindmajix offers the best training in the industry with industry experts as trainers.
Some of our on demand courses include such as Big data, blockchain, Selenium, Python, Hadoop, and Artificial intelligence.
When you cannot communicate and move your date properly and get “A device attached to the system is not functioning” error due to some reasons like incorrectly connected, incompatible drivers, and many more.
If you wish to get rid of this annoying error, here are a couple of fixes mentioned belo.Modify the Transfer to PC or Mac Settings on iPhonesTo modify the transfer to PC or Mac settings on iPhones, pursue these on-screen step by step directions mentioned below:First and foremost, go to the Settings application on the iPhone device.Afterward, move down till you locate the ‘Phone’ settings and choose it.After going to the Photos settings section, move down until you get the “Transfer to Mac or PC Settings” option.You should choose the “Keep Originals” option and attempt transferring the files once again.Now, check to view whether the problem continues.Format the DeviceTo format the drive, pursue these on-screen step by step directions mentioned below:To invoke the File Explorer, use the Win and E hotkeys simultaneously on the keyboard.Thereafter, select the ‘This PC’ icon on the desktop or left side navigation panel.You will get the USB device connected.After that, right-click on it, then choose the ‘Format’ option.You will get a prompt screen consisting of all the settings.
In case you are not sure what to choose, leave it be and hit the Start button.Once you have done, attempt using the USB device and check whether the issue is fixed.Run DISM and SFC CommandsTo run DISM and SFC commands, pursue these on-screen step by step directions mentioned below:First, hold the Win and R hotkeys simultaneously on your keyboard.Thereafter, input “taskmgr” into it and press the Enter button to open the Task Manager.You should select the File option shown on the upper left side of the screen.Then click on the “Run new task” option via the list of the available options.Thereafter, input “Powershell” into the dialog section and tick the option beneath, which says “Create this task with administrative privileges.”After getting the Windows PowerShell screen, insert “sfc /scannow” into it and press the Enter key.
This method consumes some time as the whole Windows files are being scanned by the system and checked for damage phases.In case you face an error wherever Windows states that it gets some issue but is unable to solve them, you should input “DISM /Online /Cleanup-Image /restorehealth” into the PowerShell section.
It will download the damaged files via the Windows update servers and replace the damaged ones.
Don’t stop this process, because it can take some time according to the internet connection.Update the Device DriversTo update the device drivers, pursue these on-screen step by step directions mentioned below:At first, you have to press the Win and R keys combination on the keyboard to invoke the Run section.Thereafter, insert “devmgmt.msc” into the Run section and hit the OK button.Once you invoke the Device Manager screen, go via every hardware and right on your device, you are getting the issue and then choose the ‘Update driver’ option.Finally, Windows will prompt a dialog section asking you which way you wish to update the driver.
If yes, then please read this entire post to get all the details.Method to Check the .Net Framework Version on Windows 10 ComputerAny Windows 10 user can easily get information about the .Net Framework version on their computer system.
If you want to check the current version, you need to follow the guide that we have mentioned here.
The method given here is much straightforward to follow and includes some simple steps.
Here, we will show you how to check the .Net Framework version using the PowerShell tool on your Windows 10 computer.
You can do so by going to the Start menu and then searching for “Windows Powershell.”From the results showing up on your screen, click on the PowerShell app icon to open it.And when the PowerShell window opens up on your screen, you will need to enter the following command: “Get-ChildItem ‘HKLM:\SOFTWARE\Microsoft\NET Framework Setup\NDP’ -Recurse | Get-ItemProperty -Name version -EA 0 | Where { $_.PSChildName -Match ‘^(?
!S)\p{L}’} | Select PSChildName, version.”After entering the command, hit the enter key.And now, the PowerShell window will display a list of the .Net Framework versions that are installed on your Windows 10 computer.
Just getting to know the features isn’t good enough for evaluation.
Download Saketa’s 7 days free trial to experience it yourself and then go for a decision.SharePoint Migration Tool One-Stop Solution to Migrate to SharePoint from all the Latest PlatformsSaketa SharePoint Migration tool supports migration from all the popular platforms to the latest version of SharePoint, Microsoft Teams or other platforms to ensure the most efficient and hassle-free SharePoint migration experience.Saketa PowerShell ConsoleSharePoint Security ManagerPermission audit made easyScript and automateSharePoint Security ManagerPermission audit made easyDownload Now
The article intends to explain the procedure of configuring Microsoft Outlook for a number of purposes like POP\IMAP in addition to.
Is actually usually still recommended that users follow the instructions accurately to complete the task without facing common Microsoft Outlook circumstances.For years the popular CRM vendors have claimed to do this.
And it takes more resources than every one of my company is willing pay out.At the very of your screen, particularly in the previous version of Microsoft Word, there several options of tool bar such as File, Edit, View, Insert, and some other options.
For printing, office 365 product key activation .
In the top left of in case you there is Microsoft logo, two arrows, and a floppy disk icon.With this added freedom, you will be able to stay in touch with your customers, business associates, and friends while you are on the get.
If you are connected with Exchange, you can se your meetings that are coming up as well.Formatting your text can certainly add glow and a personal art style to your design.
Therefore, it is necessary for Exchange administrator to keep a disaster recovery method which help them to recover mailbox from EDB File Exchange 2010 / 2013 when any issue or threat occur.The primary method of disaster management strategy is to have a regular backup of entire Exchange data.
This process is an important one and most of the administrators find it annoying to execute it.To help you out, this article will guide you and provide solution to restore / recover the Exchange mailbox data from .edb file in a simplified manner.
Firstly, we have to investigate the situation where we have to perform this Exchange database mailbox recovery.Reason to Restore / Recover Mailbox from EDB File Exchange 2010 / 2013There can be multiple causes or reason due to which users have to restore the Exchange mailbox from EDB file and one such common reason is the deletion (intentionally or accidentally) of entire Exchange mailbox.
When any users deleted the Exchange mailbox by mistake & didn’t retrieve before the retention period expire, then they have to recover the Exchange database.There may be other case in which Exchange administrator has to recover the data from EDB mailbox and besides this one need to recover the mailbox database or Exchange database file from server when it becomes in accessible due to malicious virus attack, dismounted or offline database, hard disk failure, etc….Pre-Requisites:To restore or recover mailbox from EDB file Exchange 2010 / 2013 you have to require these things given below:1.
Then, create the recovery database via Exchange PowerShell cmdletNew-MailboxDatabase -Server mail01 -Name Recovery DB01 -Recovery -EdbFilePath “E:\EXDB12\Exchange Server\EXDB\File\EXDB.edb” -LogFolderPath “E:\EXDB\Exchange Server\EXDB\Logs”5.
Execute the Exchange PowerShell command:Get-MailboxStatistics Database RecoveryDB01 | ft -auto7.
Even after the knowledge of the language, users may encounter some restrictions and bumps in the process.
One of the restrictions that users had reported is the shortcut of Ctrl+R is not working, which is the command to show the history or list of search.Source:-How to Fix PowerShell History Not Working?In this condition, users are not able to access the history section, which can be very helpful to users in many cases.
Powershell had created an extensive built-in list of commands used previously, which helps you to access the list of complex commands and saves you extra time to run the same and hectic command more than one time.When you can’t access the history section, then you can follow these steps to remedy the condition:Test the assembly of PSReadLineIt is not a significant problem for the users of PowerShell and it generated when users upgraded to Windows 10.
There is the possibility that you may remember the downloading the PSReadLine, even if you don’t, it comes to the Windows 10 package.It removes the traditional view of the feature of history and creates the new and more sophisticated display of the list of commands.
This function is not a built-in feature of the Windows Management Framework, so you have to depend on the third-party modules of PSReadLine.If you want to make sure that the installation has removed the problem, then you should run the command “Get-PSReadLineOption.” If you get the error referring to the PSReadLine, later, you should try to change the layout of the keyboard to en-US and check again for any improvement.Try Different Methods to Access the HistorySuppose you want to access history for some previous command, but you are unable to access history from the Ctrl+R command.Then it would be best if you tried different outlets to access history, and you can use the following cmdlet to do that:Get-HistoryGet-History | Select-String -Pattern “Search.”Get-History | Format-List -Property *Get-History | Export-Clixml -Path c:pscommands_hist.xmlIncrease Number Limit of Remember CommandAs a default, the buffer of the Command line only stores 50 commands.
You can increase the limit to save more command to store in your program memory.If you want to increase this limit, then you have to follow this process:Click the right button on the title bar of the window of PowerShell.Tap on the Properties in the list of options.Go to the Command History.Now you have to change the Value of Buffer size as per your requirements.
One such error is The Server Stumbled Error (code 0x80072F05).
So if you face this error, you should know about the solutions of this error and the user’s problems because of the generation of the error as well as it are essential to know the symptoms before treating any disease.This error can damage the cache of the Windows Store.The Server page will not be found.The Store will be unable to connect the server.There are chances that users will come across 80072ee7, 0x8000ffff error too.This error is generated when you want to access the Store, to resolve this error, you can follow these methods:Check the AntivirusIf you wish to keep your PC and its data safe from various malware and virus, you should use the antivirus programs.
There are chances that the setting of the antivirus program restricts you to access the internet, which causes the error message generation.If this is the reason, then you should go to antivirus setting and disable the settings that restrict the access of Network (or you can find them where you can add an exception and put the URL of Store).In some antivirus software such as Avast, users mentioned that they had enabled the Internet Sharing Mode under the setting of Firewall, to remedy the error.The best antivirus software is BullGuard, Panda, and Bitdefender.
(in these three you have to disable the Restriction of Network).Correct the Date and Time This solution is much simpler than others, it requires only you to check the date and time whether it is correct or not.If not then click on it and tap on the Change Date and Time Setting, then adjust them and the time zone.
It is much more accessible, so try this at starting.Erase the Cache of Windows StoreThis is a simple method where you have to work on one application, and the amount of work is also small.
For this, you should follow these steps:In the Store type WSReset.exe on the Search Bar, and right-click on it, and select Run as Administrator from the options.After for a while, you will see a message mentioning “The caches of the Store has cleared.” Now you should try to use the Store.Try to Re-register in the Store AppsGo to the search bar and search for Windows PowerShell.Right-click on the Windows PowerShell, choose the Run as Administration from the options.Once it opens type Get-AppXPackage | Foreach {Add-AppxPackage -DisableDevelopmentMode -Register “$($_.InstallLocation)AppXManifest.xml”} and hit Enter.
If you are in search of the best Exchange database recovery tool, I will introduce an amazing software where you can easily export EDB file to Outlook PST.
EdbMails Exchange Database Recovery tool.
This tool is efficient to repair corrupt EDB file and restore deleted or lost mailbox items from Exchange server database.Why you should choose EdbMails?EdbMails is an all-in-one, easy-to-use, highly scalable and professional recovery and migration tool available for a reduced cost.ExMerge utility is outdated and the PowerShell cmdlets may not give desired results.
Wherein EdbMails EDB to PST converter tool is the most advanced and simplified one.This is the major benefit of using EdbMails EDB to PST converter software, as the exported PST file can be imported to Office 365 and Live Exchange server easily.A large number of EDB Mailboxes migration may be a tough job.
EdbMails migrates any number of EDB mailboxes with ease.
It will also create mailboxes automatically on target Office 365 as well as the Live Exchange server.EdbMails Exchange EDB to PST Converter recovers the deleted mailboxes and its items which you think are lost permanently.EdbMails supports PST split based on the size of the PST during EDB to PST conversion operation.
When you turn on your system, you may, all of a sudden, encounter the ‘Could not reconnect all network drives’ error due to various reasons.
At times, the mapped network drive may fail to reconnect in Windows 10.
So, if you are facing a similar issue, then here are some solutions given below.Create Windows Wait for NetworkYou should follow these steps given below:Press the Windows and R buttons to open the Run box.Thereafter, insert ‘gpedit.msc’ into it and hit the Enter key to launch the Local Group Policy Editor.Then make the way to the following location: Computer Configuration > Administrative Templates > System > Logon.Thereafter, reach the right side and locate the policy of ‘Always wait for the network at computer startup and logon.’You should double-click on it.Later, choose the ‘Enabled’ option and click on the Apply button then select the OK button.Now, restart the PC to apply the changes.Through the Task SchedulerYou should follow these steps given below:Firstly, make a folder of Scripts in the system and then paste the PowerShell script.Thereafter, launch the Task Scheduler.After opening the Task Scheduler, select the drop-down menu of Action and then select the option of Create Task.Once you reach the General section, add a name.Then select the option of ‘Change User or Group’, and choose a user or local group.Click on OK.You should mark the option of ‘Run with highest privileges.’Select the tab of Triggers and press the button of New.For the option of ‘Begin the task’, select the option of ‘At log on’ through the menu of the drop-down.Thereafter, click on the button of OK.You have to click on the tab of Actions and press the button of New once again.Choose the ‘Start a program’ option through the drop-down of ‘Action’ and input ‘Powershell.exe’ for the box of script/program.Input the following commands for the box of ‘Add arguments’: -windowsstyle hidden -command .\MapDrives.ps1 >> %TEMP%\StartupLog.txt 2>&1For ‘Start in’ section, you should enter the PowerShell script location: %SystemDrive%\Scripts\Later, click on OK to shut the screen of ‘New Action.’Now, move to the tab of Conditions.Beneath the Network section, don’t forget to mark the ‘Start only if the following network connection is available’ box.Finally, click on the option of Any connection and select the button of OK.Installing the Update of KB4469342You should follow these steps given below:Make the way to the catalog of Windows Update.After that, browse for the update of KB4469342 and download the update for the PC.Install the update.Now, restart the PC.By following the solutions mentioned above, you will be able to fix the network drives related error.Ava Williams is a self-professed security expert; he has been making the people aware of the security threats.
His passion is to write about Cybersecurity, cryptography, malware, social engineering, internet and new media.
He writes for Mcafee products at mcafee.com/activate.Source : Network Drives
PowerShell command is designed for Windows 10 that used to manage scripts and commands.
It can also use to change custom settings and do automatic tasks.
It is an extremely capable command-line interface that gives you an extensive tool and offers to get more control and flexibility on special scripting.The script can be considered the group of commands that are stored in a text format; this command only understands by the PowerShell that can perform multiple actions and separately.
PowerShell command has a quick power task that manages the Linux, Windows, and macOS operating system.
It can manage all your commands in your computers and access your data.
It can access registry, certificate as well as all the files storage in your system.Creating Script via NotepadLaunch Start.Find the NotepadTap on the first result to start the application.Paste your script or create a new script in the given text field.Tap on “”Choose “Save As.”Enter the File title like — the second script.ps2.Tap the Save icon.Creating a Script With the Integrated Scripting EnvironmentYou can also use PowerShell ISE to identify your scripts in Microsoft windows 10.
EDB files are the most important files in Exchange Server.
These are the root files that contain the data send by the receiver in Outlook.
When the PST file gets corrupt, then the two option available are EDB file or OST file.
EDB files are the first choice as they contain the updated data.
Getting data from EDB files in PST is secure and can be performed instantly with a single command.
So, users who do not know how to export EDB files to PST can follow the given stepsPrerequisitesBack up the EDB files and Exchange Server databaseAssign Administrative rights to perform the operationWhen the following conditions met then ensure thatThe new PST file is created on the network and the user knows the location of PST.The UNC path of PST file should be knownUsers must be able to acccess the PST file easily.Now run the following command to export/ import PST FileNew-MailboxExportRequest –Mailbox edbtoexport –FilePath \\PC-Name\ExportPSTFolder\importfile.pstReplace edbtoexport with the EDB file PST with the name of PST createdPC-Name with computer in which file is exported.In this way you can export the EDB files to PST.
Every operating system covers some basic built-in features, and Windows 10 is also included in this category.
Microsoft replaced the classic Control Panel program with the modern Settings app in its Windows 10 operating system.
But sometimes, there may be chances when you need to reset the settings app.
So, if you are also experiencing any of these situations, there is no need to worry at all.
The following article is about how you can reset the settings app on your Windows 10 computer.
Here, you will find the settings organized in categories that include Devices, Phone, Network and Internet, Personalization, Apps, Accounts, Time and Language, Gaming, and much more than that.