https://www.topbrandscompare.com/brand-antivirus/windows-defender-microsoft-windows-antivirus/
Are you searching best antivirus software for windows? Get complete Windows Defender Antivirus Review that will help the user to know more about Windows Defender antivirus.


Windows 10 devices come with an inbuilt antivirus solution named Windows Defender.
However, sometimes users face issues while using it.
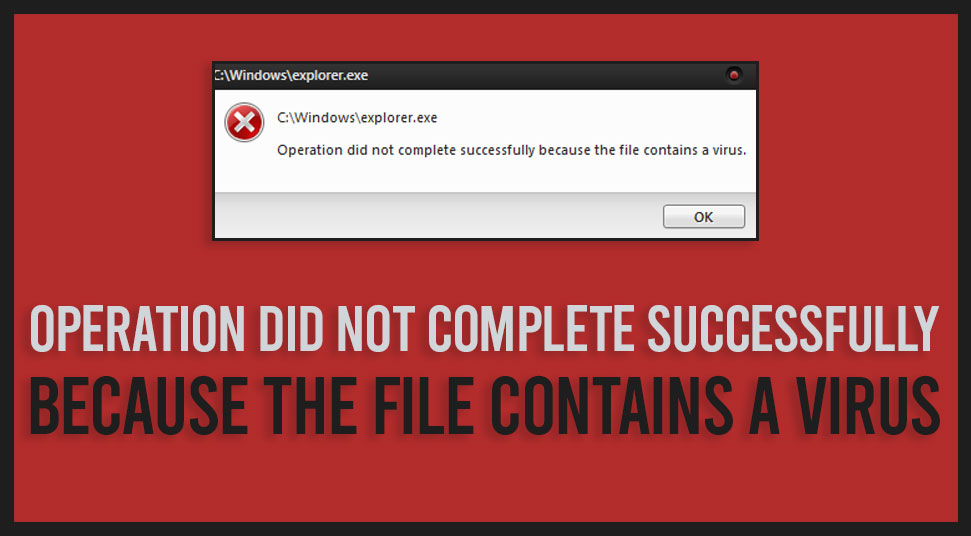
“An unexpected problem occurred” error message may pop up when you try to update Windows Defender.
In case you are facing this issue, then read on and learn how to fix it.
Clean Boot Your PCHere are the steps to follow:Tap the Windows + R hotkey and type “msconfig” in the search option.In the System Configuration window, select “Service tab” and click on “Hide all Microsoft services.”Now select the “Disable all” option.After that, click on the “Startup” button and then select “Open Task Manager.”When the task manager appears on your screen, you can see the startup applications list.Right-tap on the first result and select “Disable” from the dropdown menu.
Now you need to repeat the above steps for all of the apps in the list.Finally, you need to close “Task Manager” and select the “System Configuration” option.


Windows Defender is more than a baseline defense, it's a good tool, and there's no reason not to use it.
You can also use Windows Defender alongside other Antivirus software.
... Windows 10 Antivirus provides the same level of protection against malware as any other Antivirus for Windows 10 provides.
Mcafee support number | Mcafee customer support number

We have never doubted the software program that was developed by Microsoft, and their house Antivirus, aka Window Defender, is one of them.
However, several users haven’t disabled the services of Windows Defender.
If you are also one of those users who are facing virus related issues on your device and would like to sneak out them, then follow the below-written methods to attain the knowledge about disabling of Window Defender.
So, here are the steps to permanently turn off Windows Defender Antivirus.
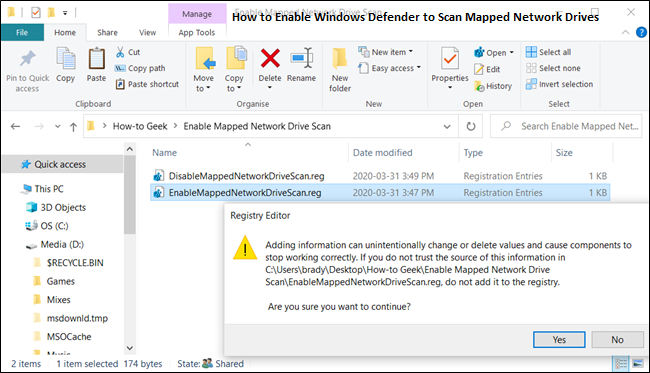
Through Group Policy To launch the Run dialog box by pressing Win + R keys together on your keyboard.After that, enter ‘gpedit.msc.’ select the OK tab to launch ‘Local Group Policy Editor.’You should search the pursuing path: Computer Configuration> Administrative Templates> Windows Components> Windows Defender Antivirus.Go to ‘Turn off Windows Defender Antivirus and twice click on it on the right-hand side panel.Choose the option Enabled, and then click on the Apply button then pick the OK tab.Search: Computer Configuration> Administrative Templates> Windows Components> Windows Defender Antivirus> Real-time Protection.Reach the policy ‘Turn on behavior monitoring.’Choose the option Disabled and select the Apply tab.Click on the OK tab.Navigate to policy ‘Monitor file and program activity on your computer.’Choose Disabled and choose the Apply option then pick the OK tab.Select the policy ‘Turn on process scanning whenever real-time protection is enabled’ and twice click on it.Reach the Disabled tab and choose the Apply option then select the OK tab.Navigate to ‘Turn on behavior monitoring and twice click on it.Later, choose the Disabled tab and select the Apply option then pick the OK tab.Now, reboot the system.Through the RegistryPress Win + R keys together on your keyboard to launch the Run dialog box.Then enter ‘regedit’ then select the OK to launch the Registry.You should search the pursuing: HKEY_LOCAL_MACHINE\SOFTWARE\policies\Microsoft\Windows Defender.Navigate to Windows Defender folder, and right-click on it then choose the New and select the ‘DWORD (32-bit) Value.Input the key name ‘DisableAntiSpyware.’ Then press the Enter key.Go to the key that was freshly created and twice click on it and adjust its value to 1 from 0.Click on the OK tab.Navigate to the folder of ‘Windows Defender’, then select the ‘New’ button and press the key.Input the key name ‘Real-Time Protection’ and hit the Enter button.After that, go to the folder of ‘Real-Time Protection’ and choose the ‘New’ then click on the value of DWORD (32-bit).Rename the key named ‘DisableBehaviorMonitoring.’ Then hit the Enter button.Twice click on the freshly made key and adjust the value from 0 to 1.Press the OK button.Reach folder of ‘Real-Time Protection’ and right-click on it.Choose the New option and press the ‘DWORD (32-bit) Value’.Give a new name to the key named ‘DisableScanOnRealtimeEnable.’ Then hit the Enter button.Twice click on the freshly make key and adjust value to 1 from 0.Finally, hit on the OK key.Through the Security Center Launch ‘Windows Defender Security Center’ on the Windows 10.After that, click on the option ‘Virus and threat protection.’You should select ‘Virus and threat protection settings.’Now, disable ‘Real-time protection’ switch toggle.Richard Branson is a technology enthusiast who loves writing about new advancements and IT threats on a regular basis.
Her work focuses on the latest advancements in the realm of technology, social media, and cyber security at norton.com/setup.

Windows 10 is building in an additional line of defense against malware with some new features for Windows Defender, Microsoft’s pre-installed antivirus.
The update is called Limited Periodic Scanning, and was revealed as part of Microsoft’s Insider Preview Build 14352 this week.
It allows users to run Windows Defender simultaneously to their own antivirus software.
Limited Periodic Scanning, in theory, will only kickstart when your computer is idle or not in the middle of some important task.
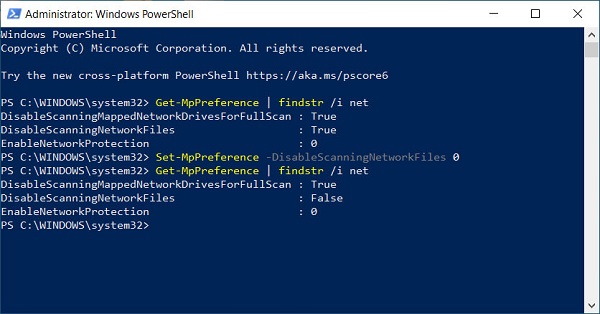
To turn on Limited Periodic Scanning, go to Settings, Update & Security and Windows Defender, and then Turn Limited Periodic Scanning on.
However, Windows 10 has still faced many concerns and criticisms over its attitude to user privacy by collecting and monitoring a huge amount of data.

Stick with Third-Party Antivirus and Turn off Windows Defender If the users are trying to stick with third-party antivirus and turn off the Windows Defender, then they should carefully apply the given steps.Hold the Win + I keys at the same time on your system to launch the Settings.After that, click on the Update and Security option.You should select the Windows Defender option from the left-hand side panel.Then select the ‘Open Windows Defender Security Center’ option.Go to the ‘Virus & threat protection field and launch it.You have to select the ‘Virus & threat protection settings’ option.Now, switch the toggle of ‘Real-Time Protection’ to disable it.
Turn off the Windows Defender in the Group Policy Editor In case you intend to turn off the Windows Defender in the group policy editor, then you can opt to follow the below-mentioned guidelines.Navigate to the Windows Search section on your system.Thereafter, input ‘group policy’ into it and hit the Enter key to launch the ‘Edit Group Policy.’Then you should pursue this path: Computer Configuration > Administrative Templates > Windows Components > Windows Defender Antivirus.Go to the right-hand side panel and reach the Turn Off Windows Defender, then right-click on it.You have to select the Edit option.Click on the Enabled option to verify the changes.Now, reboot the system for them to take effect.